Showing posts with label Taste Tests. Show all posts

Wednesday, October 10, 2012

Brownie Heaven

I love to play around with recipes, but every now and then you find a recipe that just knocks your socks off.  No changes required.  This is one of those recipes!  

Photo from Little House Living
http://www.littlehouseliving.com/ooey-gooey-brownies.html
I like to make a lot of things from scratch, but when it comes to brownies I'm normally a go-with-the-box girl.  A box of Betty Crocker fudge brownies is only $1 when you find them on sale, and frankly they are really darn good for that price!  So I never really bothered looking for a good brownie recipe to make from scratch.  It didn't seem worth the trouble.  Until now!


One day I was in a baking mood, but I was out of eggs.  That generally limits baking quite a bit, but I know there are egg free recipes out there so I went looking.  I didn't know what it was I wanted to make, but I just wanted to bake something that day!  Ever get into one of those moods?  As soon as I found this recipe for Ooey Gooey Brownies from Little House Living on Pinterest I had to try it.  It's a simple recipe and very easy because it's egg and dairy free and uses all ingredients I regularly keep on hand.


It's so easy, even the little ones can make it!  I followed the advice at the bottom of the post and doubled the recipe for a 9x13 pan.  The first time making it I was going all out and making a big batch!  And boy, was she right!  They never do last long!


On the outside they might look like any ordinary brownie, but on the inside these are ooey gooey bits of Heaven!  Right out of the oven and still warm they are gooooood, but let them cool a bit and that chocolate flavor develops more and they are great.  On day 2 though, these babies are phenomenal, like lock me in a room with the pan and leave me alone until they're gone!


I discovered this recipe a few months ago and have made it many many times since.  It's quick to whip up when you have surprise guests or anytime you get a chocolate craving.  If you can stand the wait though, make them a day in advance and you will never want boxed brownies again!  Sorry Betty Crocker, but these are my new brownies!

Wednesday, September 19, 2012

Jalapeno Corn Muffins


This is the time of year for those warm comfort foods that are so yummy we can't remember why we wait till fall to have them!  For me, corn muffins are one of those foods.  I have a chicken and vegetable soup cooking in the crock-pot today, and I wanted just the perfect food to go along with it.  Just a hint of sweetness and kick from the jalapenos make these muffins a great accompaniment!


The muffin batter I use is the corn bread recipe from the Better Homes and Gardens New Cook Book.  I have a well used 11th edition as well as an incredibly well used 4th edition that was passed down from my great-grandmother.  Although the recipes are very similar I used the recipe from the 11th edition here.


I always make corn muffins when I use this cornbread recipe, and as written it's wonderful.  But the soup were having for dinner is pretty simple so I wanted to kick these muffins up a notch with a little something extra.  Corn and jalapenos did the trick!  I used a whole can of yellow corn and about a tablespoon of diced jalapenos.  They turned out great, but next time I don't think I'll use the whole can of corn and I will definitely add more jalapeno!  


I do make one specific change to the cornbread recipe though even when I don't add anything to the muffins.  I prefer to use buttermilk or sour milk if I don't have buttermilk on hand.  I'm not a scientist or a chef so I don't know why it makes them taste better, but it just does!  To make the sour milk all you need to do is add a couple teaspoons of lemon juice (yes I know real lemon juice would be better but it's just so much easier to keep one of these little guys in the fridge) or vinegar to a measuring cup, and then add enough milk to make 1 cup.  Give it a quick stir, and then let it sit for at least 10 minutes before using.

Jalapeno Corn Muffins

Ingredients:
  • 1 cup all purpose flour
  • 1 cup yellow corn meal
  • 2 tablespoons of sugar
  • 1 tablespoon of baking powder
  • 1/2 teaspoon of salt
  • 1 cup milk or sour milk
  • 2 large eggs
  • 1/4 cup cooking oil
  • 1/2 - 1 can whole kernel corn, drained
  • 2-3 tablespoons jalapenos, minced
Directions:

Preheat oven to 425 degrees.  Spray muffin tin with non stick spray and set aside.  In a large bowl, stir together flour, corn meal, sugar, baking powder, and salt.  In a medium bowl, whisk eggs and then add milk and oil.  Whisk to combine.  Pour wet ingredients into the large bowl and stir just till all is moistened.  Stir in corn and jalepenos.  Spoon batter into muffin cups (they will be very full).  Bake for 12-13 minutes.

*Recipe adapted from Better Homes and Gardens New Cook Book, 11 ed.


I used a 12 muffin pan here (a very old well used muffin pan!), but a mini muffin pan will also work; you will probably have more batter than you can use in one mini muffin pan though.  When you remove the pan from the oven you may also need to run a knife around the edge of the muffin to loosen (another sign of my very old well used muffin pan!).  


Carefully remove muffins from the pan and allow to cool slightly before eating.  These are delicious served with a bit of butter.  These pair wonderfully with a good soup, stew, beans or chili.  Break apart and put in the bowl or serve on the side!


Monday, July 30, 2012

Mmmm Cheesecake!

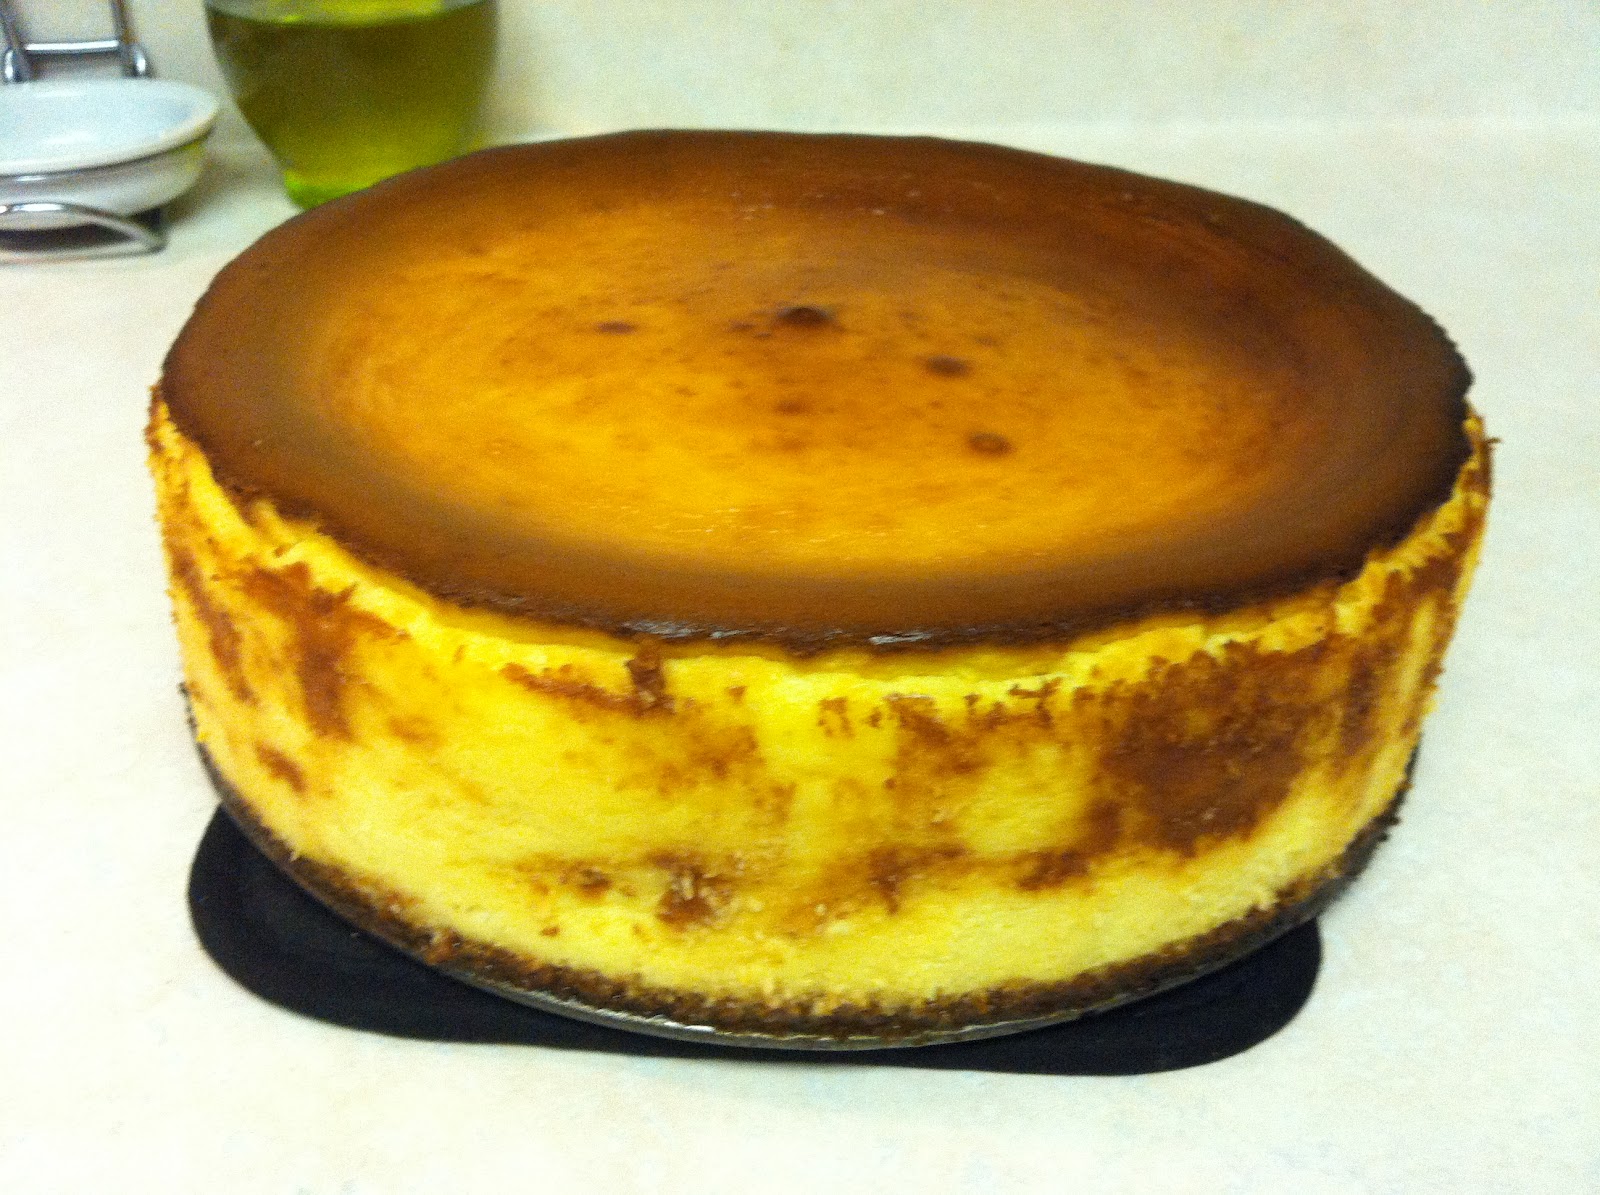
So I heard this rumor it's National Cheesecake Day!  How are you celebrating?  I wish I had planned ahead and made my favorite cheesecake to enjoy today.  Of course I didn't, so I'm settling for sharing my favorite cheesecake recipe with you instead.  (Besides, I'd much rather share the recipe, than share the cheesecake!)


I have to confess that I used to despise cheesecake.  It was always just too rich and never tasted good to me.  I even sat on my sister's birthday cheesecake once, on accident (the cake was covered up), but I'm sure at the time she thought it was because I didn't like them!  So basically I avoided cheesecake until my husband introduced me to this recipe.  This New York style cheesecake is D-I-V-I-N-E!  The recipe is from Cook's Illustrated, who I always trust to come up with the best because they test everything and really get behind the science of how to cook, or in this case bake, well.

I'm not going to post the actual recipe because I'm sure its copyrighted.  The recipe is available on Cook's Illustrated website if you are a member or in a 2002 publication of the magazine (sorry I can't figure out which one at the moment!).  It's also been spotted on many recipe sites online.  The picture above is from The Baking Pan.  They include not only the cheesecake recipe, but also the amazing strawberry topping recipe to go with it.  They also give Cook's Illustrated the credit in their sources which so many other sites do not!

This cheesecake is great by itself, but a delicious topping really does put it over the top!  The strawberry is a regular around here, but I've also taken quite a liking to a blackberry topping made using the same recipe just substituting blackberries and blackberry jam.  So if you are planning on making this cheesecake, definitely plan on making a great topping too!


Here's a picture of the last cheesecake I made.  It may not be the prettiest thing in the world, but trust me it is one of the best tasting cheesecakes you'll ever eat!


And there's no reason you can't add a little color to it!  I made this cheesecake for my daughter's first birthday party last year.  The colorful surprise was definitely a treat!  Follow steps 6 and 7 on the cheesecake recipe found here to get the rainbow pattern.


I forgot to clean off the spatula before pouring the purple into the cake so that's why there are some plain cheesecake swirls mixed in on the top!  


That didn't stop us from enjoying it though.  Here's the birthday girl enjoying her slice!  I can't believe this was over a year ago already!!


Saturday, October 2, 2010

Blueberry Muffins: Good and Good for you!

This one is for you Ashley!  After the VitaMix adventure, or should I saw disaster, the other day I was craving a really good blueberry muffin.  Healthy food should still taste good or there's no way people will keep eating it!  At $6.25 a box, the Blue Bran VitaMix muffins are a definite waste of money.  Good old fashioned whole wheat blueberry muffins from scratch are so much better and a whole lot cheaper.

To find a recipe, I just did what I always do.  I opened up Google.  After reading several recipes I was shocked to see why many of them were called "healthy".  Recipes containing more than a 1/4 cup of oil, some containing 1 cup of butter, and large quantities of white or brown sugar were all classified this way.  I'm not sure who they were trying to fool, but it wasn't me!  The recipe I finally stopped on and the one that Gray and I made for breakfast this morning is here.  I was happy to see the nutrition information given with the recipe which made it easy to compare to the VitaMix muffins.

The VitaMix muffins are healthier but that difference to me is not significant enough to justify the difference in taste.  I want a recipe I can keep coming back to that lets me still enjoy breakfast.  While the VitaMix muffins have 100 calories a piece and are labeled as fat free, the whole wheat blueberry muffins I made are only 112 calories each and have a total of 3 grams of fat (less than 1 gram of that is saturated fat).  Both muffins contain 3 grams of protein, although the VitaMix muffins contain more fiber.

Don't be scared off by the long list of ingredients for the whole wheat blueberry muffins.  Although it has 3 times the number of ingredients as the VitaMix muffins, I had everything on hand already.  And the list sounds much more appetizing than the VitaMix that calls for egg whites and water.  Our little man thoroughly enjoyed the large list as well, because he had more opportunities to "help mommy" and dump each ingredient into the bowl.  Once everything was combined it already looked (and tasted) better than the VitaMix.

After about 20 minutes of Gray asking to eat a muffin already, I was finally able to pull them out of the oven, and then after another 5 minutes of him now begging for a muffin I broke down and gave him a still very warm muffin.  I was much happier with the final appearance and delicious smell filling the kitchen, something that was lacking with the VitaMix ones.  Gray asked for seconds and also snuck a bite of a third while I wan't looking.


I made this recipe exactly as listed, however I may try change a few things next time to make it even healthier.  I wonder how it would turn out using 2 eggs whites instead of 1 whole egg and also using 4 tablespoons of unsweetened applesauce instead of 2 tablespoons of oil and 2 tablespoons of the applesauce.  I may also try using all whole wheat flour as well.  I don't think it could get as bad as the VitaMix muffins were but I also want to maintain that deliciousness of a nice warm blueberry muffin.

Move over Thai Spice

I am stoked right now and frankly can't wait to heat up tonight's leftovers for lunch (or even breakfast!) tomorrow.  I've done a little experimenting with making my own Thai food at home, but I started off relatively easy.  I'd been ordering a mixed vegetable stir fry when we'd get thai takeout and I've made that at home now a few times.  Although it turned out decent, it was nowhere near as good as the takeout.  Recently I started ordering a more classic Thai takeout dish - pad thai.  And just like everything else, I decided to make my own version at home.

When I discovered that my regular grocery store carried rice noodles I thought I'd be set.  I had the chicken, peanuts to crush up for garnish, and I already knew how to make a thai stir fry sauce.  Oh but wait...stir fry sauce is not pad thai sauce!  So after searching through a dozen recipes, I realized I needed one more secret ingredient that I definitely didn't have lurking in my pantry:  tamarind paste.  I had never even heard of this stuff let alone knew what it looked like.  After stopping at two big name groceries stores, I called my sister to have her find the nearest Asian market.  Turns out, it was pretty close by.  I walked in, asked for this mysterious ingredient, and walked out with a block of weird brown stuff.

Now I was all set for my first adventure into making pad thai.  Well almost anyway, when I got home and started sifting through all the pad thai recipes again I realized I needed green onions too.  Luckily I just called my sister again and voila...she showed up just before dinner with a fresh bunch of green onions.  Her reward for all of the helpfulness today:


I'd say that was worth the effort!  Once I had all the ingredients I needed and after writing down the final version of the recipe I planned to use, preparation began.  The most important part of making any kind of stir fry is to have everything prepared before you begin.  I felt like one of the TV chefs having everything out in little bowls ready to dump into the wok.  I had the rice noodles, marinated chicken, minced garlic, green onion, fresh coriander, and eggs all setup in various size bowls on the counter.  The crushed peanuts and bean sprouts remained in their bags but still ready to go.  

Pad thai sauce turned out to be much easier to make than I expected.   I give credit for this to the many step by step recipes that can easily be found with a Google search for pad thai.  Thai cuisine focuses on flavors that are sweet, sour, spicy, and salty.  The pad thai sauce not surprisingly is 4 ingredients, one from each category.  Brown sugar (or palm sugar) for the sweet, Tamarind paste for the sour, chili paste for the spicy, and fish sauce for the salty.  This wonderful combination is no doubt what creates the cravings I have for some yummy Thai food!

Once the sauce was ready, and my rice noodles were soaked and ready to go, it was time to stir fry.  I heated up my wok, added some oil and.....OH $%&#.  It caught fire!  Hmm well I think that pan was on it's last leg anyway.  I think I had been reading about how important a hot wok is to stir fry and forgot just how hot my burners really do get when they're on High.  So after switching to a different pan, a smaller newer wok, I lowered the temperature a bit and began my stir fry.

First went the garlic, then the marinated chicken.  The marinade was just a combination of soy sauce and corn starch.  It didn't look very appetizing, but once it started cooking it smelled divine!  Once the chicken was nearly done it was time to add the eggs (I guess that answers that question about which came first).  I scrambled them around for a minute and then added the noodles and the sauce.  Finally it's started to look like real pad thai!  There was another minute or so of stir frying and then the addition of fresh bean sprouts.  Another minute or so more and it was ready for a garnish of green onions, fresh coriander, and chopped peanuts.  I'm not sure how they say "Bam" in Thailand, but that would be the moment!

I made it in two batches because I had to switch to a smaller wok.  The first batch was plenty split between three people.  It was a touch on the spicy side for our little guy so he enjoyed some of last night's tostada fixings with tortilla chips instead.  I couldn't wait to dig in, so I made the second batch after we finished eating.  I spent just about an hour on preparation and cook time which is pretty close to the time it takes me to order takeout and drive round trip to get it.  The cost savings from making it at home though is enormous!  This will definitely become a regular recipe in my kitchen.  I know it's not a healthy meal, but I may be able to experiment with ways to make it better.  I could easily omit the peanuts and use less egg or even omit egg altogether as well, add a few more complimentary veggies like bok choy or shredded carrots, and cut back on the oil.  I may even get adventurous and try it with tofu sometime instead of chicken.  Now that I know I can make the dish, the possibilities are endless!  Now I just have to figure out how to make the Thom Yum soup that Link always orders to go with this!

Thursday, September 9, 2010

My Chocolate Fix

The other day I saw a tweet by The Next Food Network Star winner, Aarti Sequeira, about a 5 minute chocolate cake.  The recipe is from Instructables.com and sounded amazing.  I mean who wouldn't want a fantastic warm chocolaty dessert in just 5 minutes.  Unfortunately I didn't have any chocolate chips on hand when I saw the recipe or I would have been making it right away.

After picking up some chocolate chips on one trip to the grocery store and a new set of measuring spoons on a second trip to the grocery store, I finally had everything I needed to make this cake.  I decided to do so as a bedtime snack last night.  I was sorely disappointed with the result.  What came out of the microwave looked and smelled like a wonderful chocolate cake, however once that forkful of deliciousness hit my mouth it was a whole different story.  It was anything but delicious.  I couldn't fathom how something could smell so good and look exactly like a piece of cake (icing excluded) yet taste so horrible!

I couldn't stop thinking about it.  After all there had been a ton of raving comments about the recipe and I couldn't imagine people raving about the nasty stuff I had sitting in a cup on my counter.  So I started reading through them to see where I went wrong.  It seems almost everyone had their own take on this recipe, many people trying gluten free substitutes or just adding an array of other goodies to it.  After a few pages I found what I needed to know.  Experimentation was the key and altering a couple ingredients was all that was needed.

The most important part of getting this cake to turn out right is that everything must be mixed really well.  Although a coffee mug is perfect for "baking" this cake in the microwave, it is not the perfect vessel for mixing it.  And if you think about it, you don't mix a cake batter in the pan that you bake it in the oven in do you?  So I got a small mixing bowl out and started working.

Mix all of the dry ingredients, adding a pinch of baking soda, really well with a whisk in a bowl.  I used all purpose flour and regular granulated sugar but many commenters on the recipes page suggested that other types of flour and sugar worked just as well.  Then I added 1 egg, whisked, to the dry ingredients.  The recipe only calls for 2 Tbsp of the whisked egg, but since that's what I had used in my first attempt and the results were less than pleasing, I decided to see what happened when I used the whole egg.  And why waste part of a perfectly good egg anyway?  Once the egg is mixed in, add the milk and oil and stir well.  Then add your vanilla and chocolate chips.  I want to point out that you only need a little touch of vanilla.  If you add too much vanilla you could flambe your cake into a terrible mess in the microwave.  Vanilla extract contains alcohol and could catch fire!  When everything is all mixed in, pour the batter into a standard size coffee mug.

There was a lot of debate in the reviews on how long to microwave the cake.  In my initial attempt at this cake I let it go for just over 3 minutes.  I was using a larger coffee mug and couldn't see the cake rise (or fall) while it was in the microwave so I couldn't tell when it was actually done.  Using a standard size coffee mug, you will see the cake rise up over the top of the mug while it's cooking.  If it starts to fall, it's gone too long!  My second time making this cake, it was in the microwave a little over 2 minutes.  You can stop the microwave and check your cake at any time, and reviews claimed that it's better to pull it out too soon than let it overcook in the microwave.  After all it will continue to cook a little after you take it out of the microwave and let it cool a bit.

It's up to you whether or not you want to eat it straight out of the mug or turn it out onto a dish.  I had no problems getting it out of the mug, and this allows you to cut the cake and share it.  There's definitely plenty to do so!  I wish I would have taken a picture of it this time to share, but I couldn't wait to dig into it and neither could Gray.  I'm so glad that I was curious enough to try this again!

Wednesday, September 8, 2010

The joys of repetition

It takes so long to get ready and get 2 kids out of the house to go anywhere these days.  I feel like all I really got done yesterday was make 2 trips to the grocery store (however I did manage to get that shower I put off from the day before!).  On the first trip, after I had already been around the entire store, checked out and was ready to leave, I discovered that Gray had discarded Alia's blanket and bonnet somewhere without my knowledge.  So I had to retrace my steps back around the store until I found them lying on the floor behind a clothes rack I had stopped to look at!

On the way home Gray informed me that he was tired and promptly fell asleep in his carseat.  I hate when this happens because it means he will not be napping at home!  It was also such a short nap because it only lasted until we got back to the house that he felt the need to repeat his nap in his carseat on the way to my second trip to the store a couple hours later.

I did not intend on having a repeat trip to the store yesterday until I went in my kitchen to try this 5-minute chocolate cake-in-a-cup recipe and discovered that all of my measuring spoons were missing!  Now I had just used these a couple days before while making some homemade waffles and after a thorough check and double-check of the sink, dish drainer, and every other drawer in the kitchen, I interviewed the only culprit in the house:  Gray.  He informs me that he doesn't remember what he did with them, and then with a look of utter disbelief says "oh no, we'll never find them!"  I'm guessing that's a very true statement!

So back to the store I went.  I had to have measuring spoons and of course the Wheat Thins and ice cream that I also picked up when I went back!  I did not make the chocolate cake that I was planning on however, I decided to use up some ripe bananas and make a banana cake with chocolate frosting instead.  FYI, sugar-free chocolate frosting is terrible.  Although most of you probably already were aware of this because after all the name "sugar-free" implies this important fact!  I should have done my homemade cream cheese frosting for this banana cake like I did the last time I made it, but I thought a quick and "healthier" icing would be better for me.  I think it may turn out to be better for me though because now I'm not sure I will eat any more of the cake!

The other thing I revisited yesterday was a Tyler Florence recipe for sweet potato matchsticks.  Here is a YouTube video of him fixing them.  I absolutely love them, however I'm not sure they're worth the effort considering how long it takes to cut up a sweet potato into tiny little matchsticks and the fact that I caught my stove on fire again while making them.

So yesterday was a day of repeats.  Here's to hoping I can get more done today with only doing things once...well excluding breast feeding, diaper changes, cooking, and all those other things that have to happen more than once!