Showing posts with label Kid School. Show all posts

Tuesday, June 4, 2013

Weather Themed Sensory Tub

Now that school is out for the summer, I'm finally getting back to some of our preschool crafts and activities. We hadn't been doing a whole lot in that department over the last few months, and I'm running out of time!  It's hard to believe that my son will be starting kindergarten at the end of next month!  This summer is going to go so fast!

We've made a few trips to the library in the past couple weeks and aside from signing up for the summer reading program and picking up all kind of story books, we picked up several books about weather.  I grabbed books about storms, tornadoes, wind, and sun.  We are going to spend some time learning about the weather!  And so far, the weather has been perfect too, because one morning we woke up and it was raining.  I pulled out the book about rain, and we made a raindrop craft.  Yesterday was cloudy, so we learned about different types of clouds.  Today is bright and sunny, so we are reading a book about the sun and making a happy sun craft!

To go with our weather studies, I decided to put together a quick weather themed sensory tub.


It's been a while since I've made a new sensory tub for the kids to play with so when they realized what I was doing, they were pretty excited!

The main ingredient in this sensory tub is of course cotton ball clouds!  Yesterday's cloud activity used cotton balls to depict different types of clouds.  We based it on this post from Carrots are Orange.  And now I'm completely out of cotton balls!


I used the same big yellow gear for a sun that I used in our Space themed sensory tub.  I added a few hard golf balls and some little white pom poms to represent hail and snowflakes.  Thanks to last month's hailstorm, the kids are very familiar with how hard (and damaging) hail can be!

The tiny blue beads represent raindrops, and turned out to be a perfect choice.  The kids were picking them up and letting them drop out of the clouds like rain!  


I cut cloud shapes out of a dark patterned piece of felt to represent storm clouds, and I cut lightning bolts out of yellow foam sheets.  As I was going through our craft cabinet I came across some weather words from an old calendar we had and put them in the bin as well.  We can practice spelling out the words, and they can guess what the words are by the pictures on them.  


I found some little American flags that I put in as well.  My son was confused as to what they had to do with weather, until I asked him what made the flags move.  He held it up and blew on it, and then he yelled "wind!"  

The best part of watching them play with their new sensory tub is when they started using all the pieces to act out the Itsy Bitsy spider.  I ran and grabbed a spider from our old Halloween tub, and they put on a little play of the song!  Priceless!!


Tuesday, May 28, 2013

Teacher Appreciation Flower Pot

This is going to be a quick post, about a simple but adorable teacher appreciation gift we made for my son's pre-k teachers.  I saw these tulips floating around Pinterest the other morning and knew immediately they were something I wanted to make.  And when I remembered that our son's last day of pre-k and graduation program were quickly approaching I knew exactly what I needed to make them for!


This link over to Mama Miss is where you can find the FREE printable for the tulips and instructions on how to put them together:  http://www.mamamiss.com/2013/05/22/create-kiddo-diy-tulips-upcycled-vase-and-printable/.  They also include a link and tutorial for making your own rope vase using an old baby food jar.  

I didn't have any baby food jars, but decided to hit up the dollar store for some cheap glass vases.  When I got there however, I saw these adorable gray flower pots in a package of 4 for $1!  That deal was just too good to pass up.  I needed to make three pots, one for each of his teachers, and the extra pot lets me make one for myself too!

Once we had the tulips put together, I added in some fake moss.  It helps hold the pipe cleaner stems down in the pot and adds to the "planted" look of the flower pot.  

To finish off the gift, I went to my good friend Google to help me find a great gift tag.  I knew I wanted the message to be something about "growing", and I found exactly what I wanted at Living Locurto, this FREE printable gift tag:  http://www.livinglocurto.com/2012/04/teacher-gift/.  They use the tag on real plants as teacher appreciation gifts.  I love that idea too!  I love getting plants!  Instead of gluing the tag to a Popsicle stick, I hole-punched them and tied a ribbon through the tag around the tulips in the vase.

And there you have it, a great long lasting, maintenance free teacher appreciation flower pot!  

Thursday, November 29, 2012

The Crippled Lamb Story and Handprint Activity


We received this book as a present one year, and it's one of my favorite stories to read to the kids.  I love the message, and almost can't get through the story without tearing up.  I also really love any craft involving the kids' handprints so adorable handprint lambs were a must (We even made them last Easter too!)


First we gathered up all of the supplies.  I used a piece of plain cardstock to trace the kids' hands.  I wanted to turn the sheep into puppets for the kids to use while I read through the story this time, so that's what the Popsicle stick is for.  I initially planned on stapling the sheep to the stick, but I seriously underestimated the thickness of the jumbo Popsicle sticks and seriously overestimated the power of my mini stapler.  Luckily glue worked just fine instead!


I let the kids choose which hand they wanted to use and I traced and cut the handprints out for them.  Then they got to work creating their sheep.  We started by making the face with a googly eye and a black marker.


Then they covered the body of the sheep (or the palm of the hand) with glue and started attaching cotton balls for the sheep's wool.


Scunch in as many as you can as long as the glue holds.  You can tear apart the cotton balls or glue on the whole piece like we did.


After the wool was done, we added a little red bow just to make it extra special.  They also colored in the legs (or just the feet) with the black marker and attached the Popsicle sticks with the glue.


I think they turned out pretty darn cute!


Then they had fun holding them up and moving them around while we read through the story.  I loved every minute of it!


Tuesday, November 13, 2012

Mister Seahorse Craft

Who doesn't love an Eric Carle book?  We love every one we read.  We finally picked up Mister Seahorse at the library last week, and of course had to make a seahorse after reading the book.


I have yet to fix our broken printer so instead of printing out a seahorse template, I simply traced the seahorse on the cover of the book.  Then I outlined it with black marker so the seahorse really stood out.


Then we cut brightly colored tissue paper into small squares.  The kids used watered down Elmer's glue to paint the tissue paper onto the seahorse.  The colors overlapping and blending together really make the seahorses look neat (and just like images in the book).  They glued on a googly eye once they were dry.


Such a simple craft, but they really turned out neat!


Sunday, November 11, 2012

Montessori-Inspired Practical Life Baking Tray


I finally got a chance to clean up our preschool cabinet and decided it was once again time to change up some of our Montessori-inspired tray activities.  I wanted to create a tray based on something that would be very useful during the upcoming holiday season, and one of things I'll be doing most over the next couple months is baking!


I took a small 12 cup mini muffin pan, a small pot holder, 12 mini paper baking cups, and 12 cotton balls (for the batter), and created a practical life cupcake baking lesson.  The kids are already obsessed with it!  They place a paper baking cup in each slot, then the "batter" into each baking cup.  Then they pop it into the oven, not the real oven though.  The piano bench has been dubbed the oven just for this activity.  Leave it to the minds of toddlers to get so creative!  They wait a few minutes, excitedly waiting for their cupcakes to bake, and then carefully pull out the pan using the potholder!


We even get to pretend eat them, and then put everything back before starting over!  With this much fun, this tray might stick around for a long time!

Saturday, November 10, 2012

Our Thankful Tree


This idea came from (don't be surprised!) Pinterest!  Bargain Bound's Thankful Tree was so cute, I had to make our own.  I took a few sheets of brown construction paper and went to town with some scissors.  I got a little wild with some of the branches but I think it at least resembles a tree.  


For the leaves, I stacked a few sheets of red, yellow, green, and orange construction paper, traced around a silk leaf from a fake plant, and cut out the leaves.  This was definitely time consuming.  Next time, I will look for some ready made leaf cutouts!


We started off with the leaves at the bottom of the tree, like the post on Bargain Bound.  However, our miniature dachshund who likes to chase and eat leaves decided she wanted to eat those leaves too.  So I moved the leaves up into the branches.


It's neat to see what the kids come up with everyday.  My two year old has a bit of difficulty with this.  I don't think she quite grasps what we're doing, but she listens to her brother and tries to come up with something.  On the first day, she chose her pink bear (aptly named "Pink"), and every day she still says she's thankful for Pink, but I tell her to choose something different each day.  Today it was cabinets.  Of course that's where she likes to play!  Without cabinets, she'd be forced to actually play in the play room or with toys!


I can't wait to see what the kids come up with as the month progresses.  They are running out of family members to choose so I'm sure it's going to get more creative!  

Friday, November 9, 2012

Paper Plate Turkey Craft


Our paper plate pumpkins were so much fun.  Well actually anything that involves finger painting turns out to be a lot of fun even if it gets a bit messy.  Since Thanksgiving is only a couple weeks away it was a perfect opportunity to create a turkey, and since we had to get showers before preschool anyway it was also a good time to finger paint.

Materials:

Paper Plate
Brown Paint
Red, Orange, Yellow, and Brown construction paper
Glue Stick
Black Marker

Directions:

Strip kids to their underwear to minimize ability to ruin clothing!  (Note:  only do this if you are making this craft at home!)  Next cover the painting area thoroughly.  I used newspaper this time, but we also like to use an old vinyl tablecloth for these types of activities.  Regardless, paint will still end up places you don't want it to.


Then set the paint down and watch chaos ensue.  This is my favorite part.  I don't know what it is about getting paint on your fingers that makes kids laugh and smile so much, but any mess created as a result is worth every bit of it!  Once the paper plate is thoroughly covered, now begin the tricky step of getting the kids into the bathtub without getting brown paint all over every surface between the table and the bathroom! Good luck!


Depending on how long it takes to give the kids a bath, the paint may or may not be dry afterward.  We took a break for an early lunch before finishing the turkeys.  Putting the turkey together turned into a great opportunity to discuss the parts of a bird.  We talked about their feet, beak, feathers, and (I had to look up what that little red thing hanging from the turkey's face was called) the wattle.


I cut the pieces out of construction paper.  I didn't have a template, I just cut.  So they aren't identical, but still cute.  Then the kids glued them on.  I helped my two year old by putting the glue on for her as a guide for where to put each piece.  My almost five year old did his all on his own, and insisted on giving his a smiley face.


He's been learning some turkey songs at school for an upcoming Thanksgiving party, and these turkeys are giving us another reason to sing and dance while practicing the songs!  Have fun!

Friday, October 19, 2012

Fall Leaf Sorting


Children LOVE to sort things.  I don't know what it is about grouping things into categories that is so instinctual for them, but they love it.  They love repeating it.  And they are really really good at it!  So creating interesting sorting activities is always on my to-do list.


I bought this bright orange condiment server to use at a birthday party, but it has since become one of our go-to sorting tools especially for smaller items.  We've used it to sort beans and pom poms and a few other things.  The bright orange color makes it the perfect fall season tray for leaf sorting too.


These little foam leaves are a good size for little hands and come in four beautiful fall colors: purple, brown, green, and yellow.  They also come in three different shapes.  So we can sort two ways!  I found these leaves in a package at our local dollar store.  An alternative would be to cut your own leaf shapes out of foam sheets or even cardstock or construction paper.  


What's more fun that sorting fake leaves?  Sorting real ones of course!  The bonus here is that we get to go outside and pick up a bunch of leaves to sort through!  It's always fun to see all the wonderful colors straight from nature. 


Tuesday, October 16, 2012

Word Up! It's Dictionary Day!

Today, October 16, is National Dictionary Day.  It's the birthday of Noah Webster (And coincidentally several other people I know!  It is a very popular day to be born).  Dictionary Day is a day to celebrate language, learn new words, or teach others a new word or two.

from http://www.squidoo.com/dictionary-day

Here's an excellent post on Squidoo that has compiled a mass of information about Dictionary Day, the history of the dictionary, as well as activities for all ages to celebrate this special day.  I remember playing  the Dictionary Game when I was in school.  I always enjoyed that one.  I also like the idea of the dictionary race, but our little ones are too little for those games.  

When trying to decide what activities I did want to do with the little ones for Dictionary Day, I first realized we don't actually have a dictionary!  In this day and age of technology with computers and smart phones, I realized Google had become my dictionary!  That's something we'll definitely have to rectify, so perhaps a good way to celebrate today is to go buy our own dictionary.

from http://www.dallastown.net/Page/3434

Don't want to have a physical dictionary?  No problem.  Check out this post for links to free online dictionary resources  for everyone!

We are making a trip to the local library today to look for different kinds of dictionaries, learn some new words, and enjoy our language!  How do you plan on celebrating Dictionary Day?

Thursday, October 11, 2012

Halloween Themed Sensory Tub


Fall is here and that means Halloween is right around the corner.  We are still finishing up a few of our dinosaur projects, but I couldn't wait any longer to get the Halloween things out!  This week we decorated our front porch for the spooky holiday, and we picked and added our mini pumpkins to the fall centerpiece on our table (look for that post tomorrow!).  And now we have our Halloween sensory tub!


I was very excited about the filler in this tub.  I wanted something that really stood out for fall and the first thing that came to mind was straw.  I found a good size bag of natural raffia in the clearance section at the store.  I cut it into straw size pieces and it looks really authentic!  


Also in the tub we have,

  • Small orange gourds
  • Fall colored leaves
  • Witch and Pumpkin shaped cookie cutters (Almost all of our tubs have cookie cutters that the kids can use with Play-doh while exploring the tub)
  • Various creepy crawlies - spiders, scorpions, ants
  • Spooky Halloween shapes - bat, skeletons, etc
  • Not pictured:  spider web (really just a couple cotton balls stretched and pulled apart - this was added after we put the spider web up on our porch)

I love how the tub turned out.  And the kids ask to explore it every day.  We have been talking about the different insects and counting their legs.  They love the shapes and feel of the gourds.  Although the ones in this tub our fake, the ones in the centerpiece on the table are real and they can compare them.  

After Halloween, I will remove the creepy crawlies and Halloween items.  I'm working on ideas for a Thanksgiving theme, with pilgrim and Native American items and things we are thankful for.  If you've got any good ideas for this share them in the comments!


Monday, October 8, 2012

Growing Mini Pumpkins - The Easy Way!


I've taken a break from blogging for a couple weeks, but that's just given me a chance to line up some great falls posts.  First up, our mini pumpkin adventure!  It was the easiest thing we've ever grown!  And for just 50 cents and a whole lot of waiting you can grow your own mini pumpkins too!

Fall 2011 Holding Miniature Pumpkin
We pick out large pumpkins every fall at the pumpkin patch, but I also like to pick up a few mini pumpkins for the kids as well.  They're super cheap and their size makes them great for the little ones to handle and explore.  Sometimes we paint them or just use them as decoration.  


Last year we sat them on the porch with the large pumpkins.  One just happened to fall off into the flower bed, and me being the lazy gardener that I am, never bothered to pick it up.  Ever.  I just left it lying there in the flower bed, walking past it whenever we went outside or came back home.  


Pretty soon, I forgot it was ever there, that tiny little pumpkin rotting in the flower bed.  In the spring, my tulips came in again and my hosta grew bigger.  I had no idea what else was about to sprout in that small flower bed.


I'm sure I thought it was a weed at first, but as I already mentioned...I am a lazy gardener.  I don't weed often.  Eventually it grew bigger and bigger, and I quickly realized it was not a weed.  That miniature pumpkin was back!


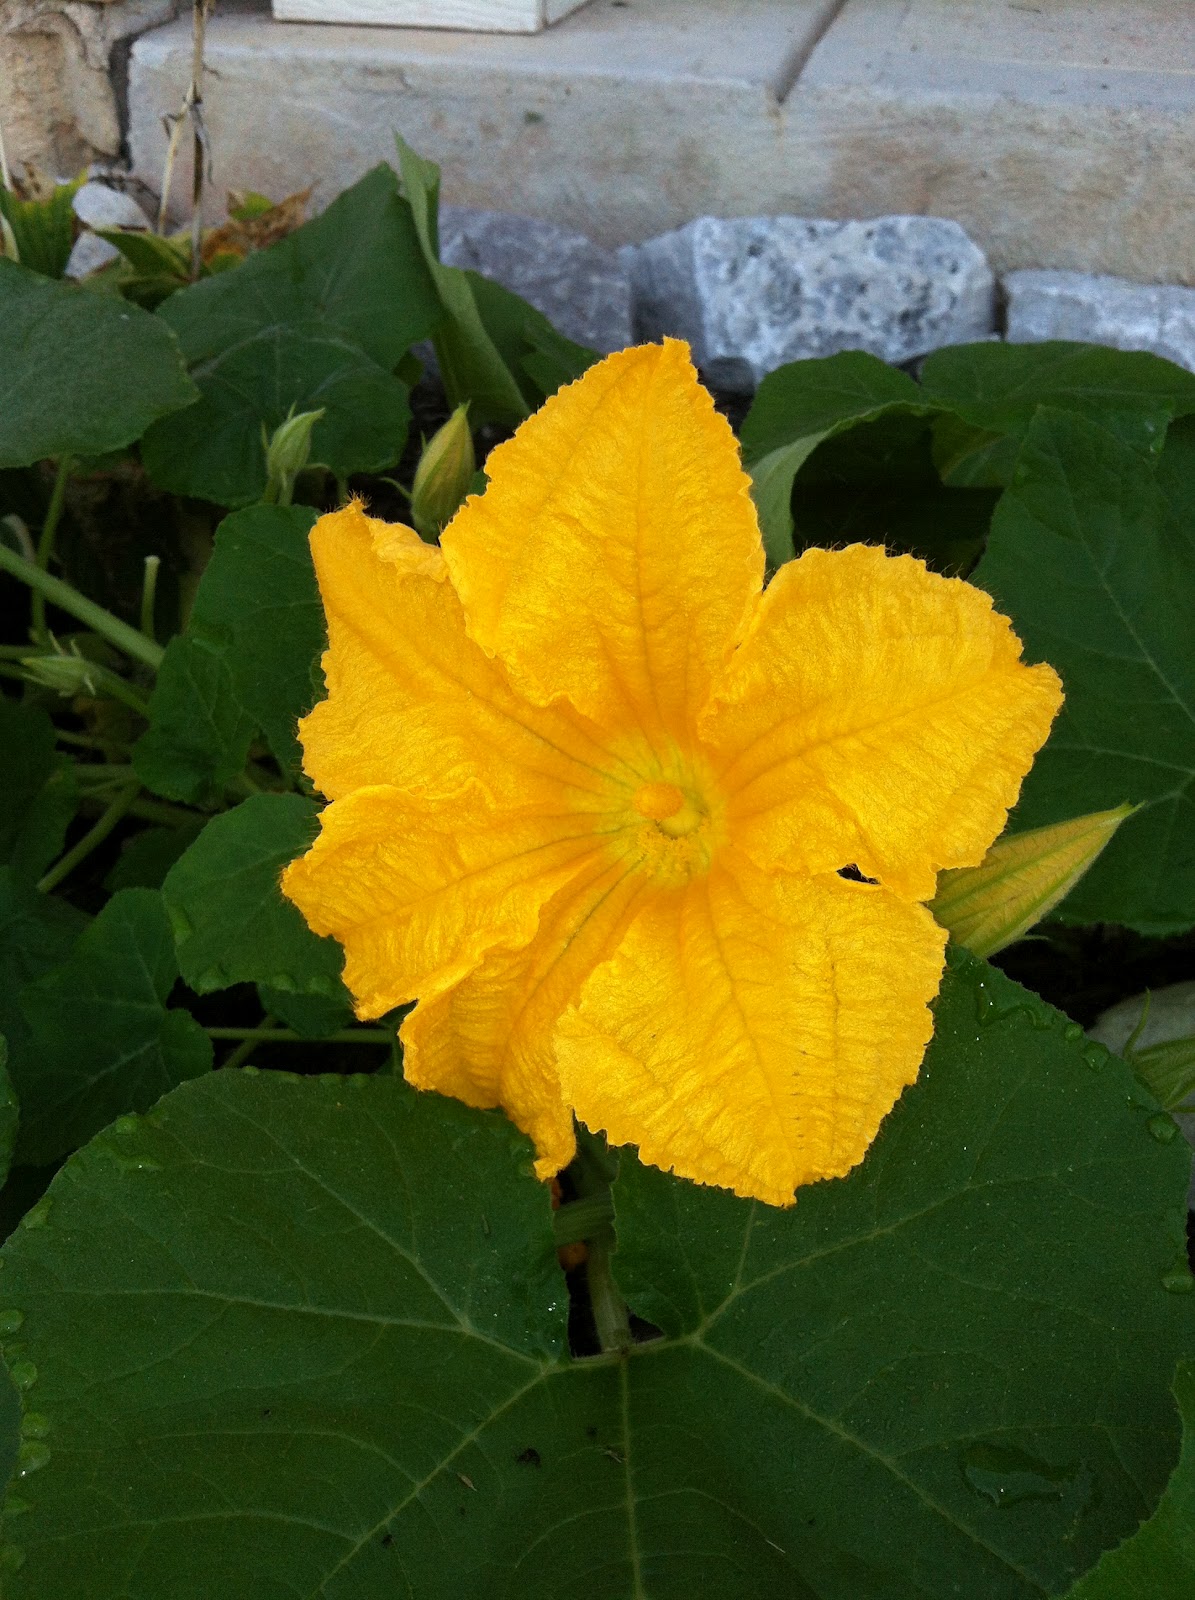
We've enjoyed watching it grow over the past couple of months.  The leaves were huge and beautiful and the blossoms were bright bright yellow.  The little ones looked forward to checking on their pumpkins each time we'd go outside.


At first it looked like we might get several mini pumpkins.  But only two of them really started to grow past the blossoming stage.  Two is a good number though.  There is one for each of them.  


Last night we had the first major frost.  My son thought it had snowed because the ground was so white from the frost this morning.  I decided it was time to pick our pumpkins and get them inside.


They each pulled their pumpkin off the vine, being careful to leave enough of the stem.


They are so proud of them!  Their little miniature pumpkins!  We did nothing to them but watch them grow.

Fall 2012 Holding Miniature Pumpkins