
Showing posts with label Art. Show all posts
Showing posts with label Art. Show all posts
Thursday, December 5, 2013


Thursday, March 7, 2013
Weeds and Woods
I think I might have an unhealthy obsession with photographing weeds. I blame my former years in FFA doing crops judging and studying countless photos and samples of the local Indiana flora. In the last few weeks, I swear I've taken a picture of every weed I've seen (too bad I don't remember their names anymore!) Once I get the pictures uploaded to the computer though, I'm not always as happy about them as I was when I snapped it walking through the woods. This time, however, I find these still remarkably beautiful!

I couple weeks ago I downloaded a free Photoshop action called Bella from this website. I've tried it out on several different pictures but always ended up scrapping the edit. It just wasn't right for those pictures. On these lovely little weeds however, I think it's perfect! I love the different pops of color, especially the subtle bluish gray color, and the overall sweet softness of the photo. I think it's one of those actions you just have to be in a certain mood to use!

I used the same action on this tree, but I'm not as happy with it. The softness and color scheme just doesn't seem to work as well here, perhaps because the photo is so much busier (or perhaps I'm just not as excited about trees as I am about weeds!)

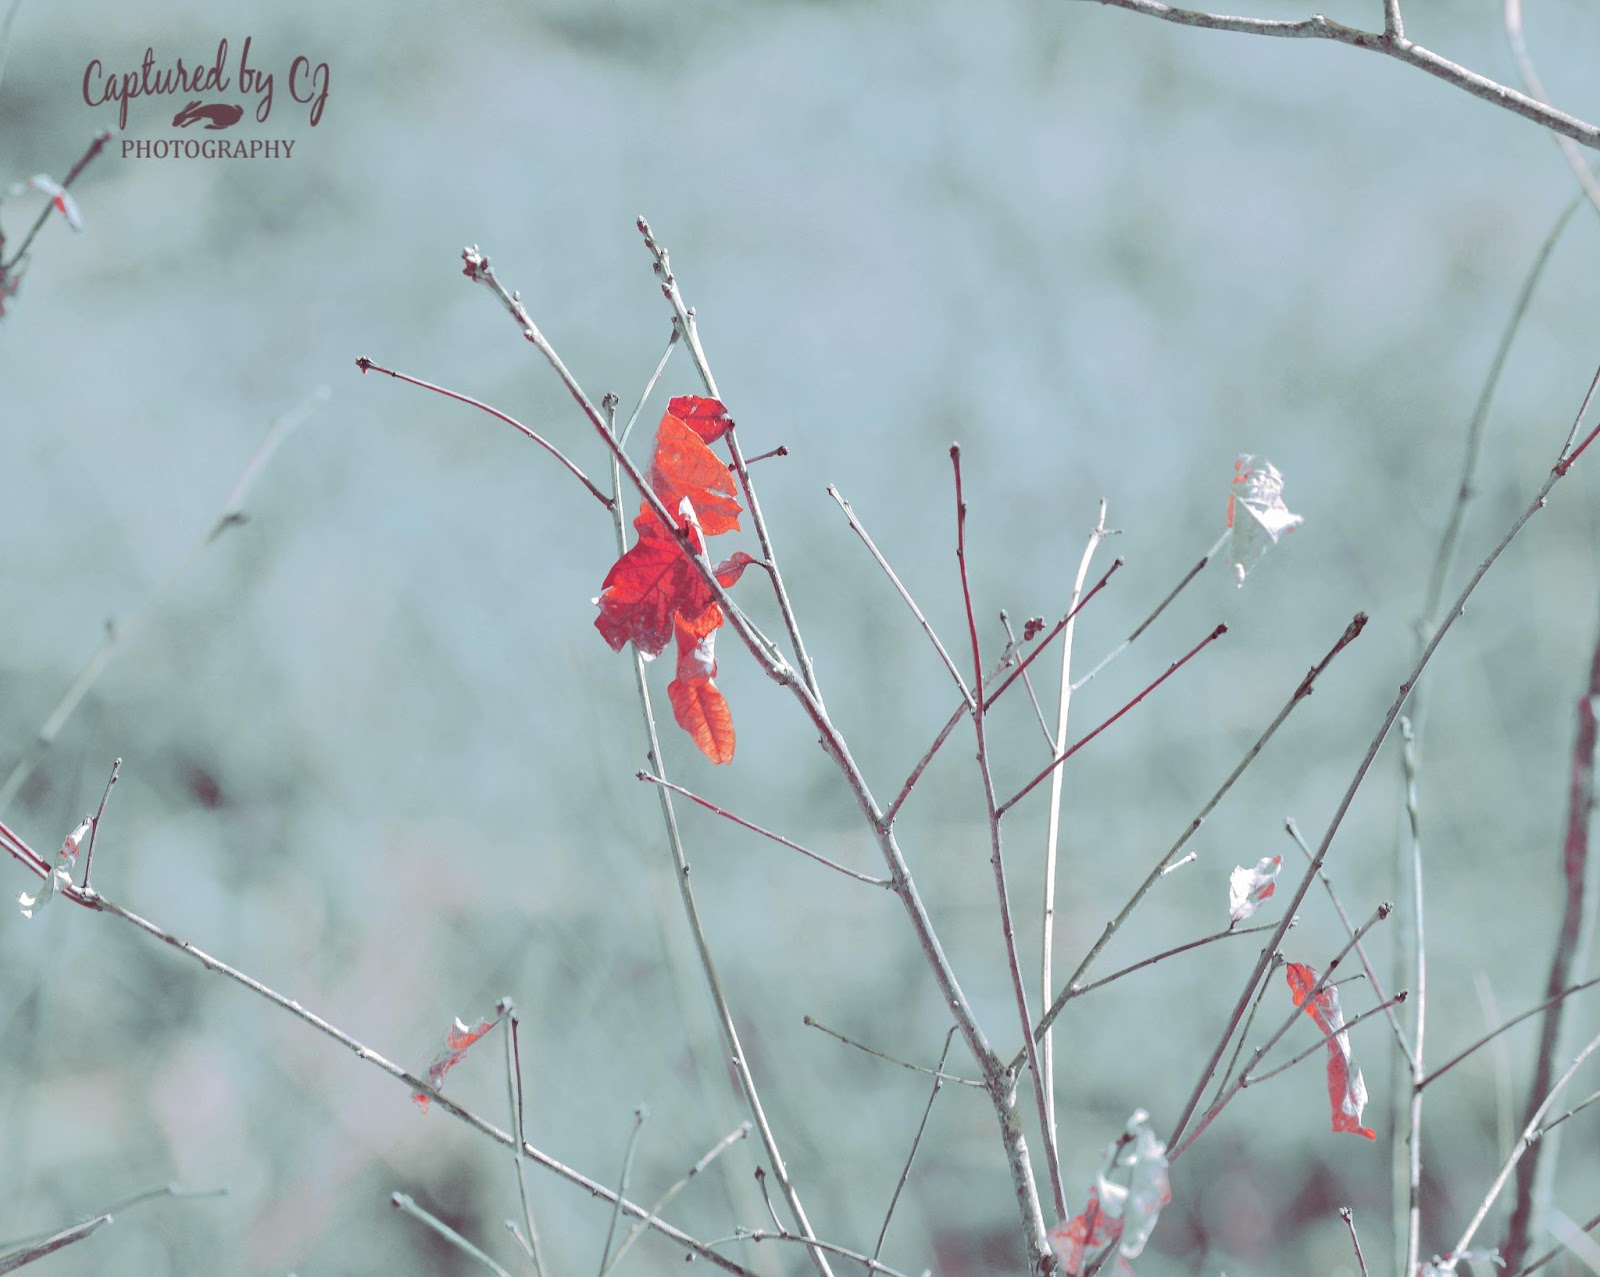
These next three pictures were just some fun Photoshop editing. I need as much practice as I can get so I was playing around with the same photo to get different looks. I think the bluish one is my favorite. I like the contrast it provides to the orange leaf the best.


All of these pictures were taken over the weekend at my in laws house. They have an amazing view from their back porch. I could sit there for hours watching birds or squirrels or whatever other animal dared to show up. This was one of the last pictures I took for the day of the late afternoon soon shining across their deck.

Can't wait to get back out there and shoot some more photos. Spring and summer will be just as beautiful and hopefully I'll see some more animals too!
Wednesday, March 6, 2013
March Snow
Are we sure it's March already? I have to keep checking the calendar because this view outside does not scream spring is right around the corner. This view screams bust out the hot chocolate because it's chilly out there!
This picture I took first thing this morning. I love that I can stand at the back door and zoom in on the trees behind the house. This was fresh untouched snow, and it looks amazing! I just thought I'd have to wait until next winter to get snow pictures like this with the new camera.

This afternoon we got out to play in the snow a bit. Well, I played with the camera, not the snow! It was brighter out but not really because of the sun, so there was still plenty of snow left on the branches. It's hard to believe all of this is supposed to be gone by the weekend. The little heat wave is bringing temps in the 50's. Got to love Indiana weather!


My new camera bag also arrived with the snow today. I am super excited about it. After I get a chance to break it in and fill it up, I'll probably do a review post about it. Here's a quick look though. It's a beautiful bag, and of course its my favorite color!

Wednesday, February 27, 2013
Abstract Art for Kids
Almost every day, my two and half year old asks me if we can paint. She loves it! And I love that she loves it! While drinking my coffee and scrolling through Pinterest this morning, I saw this post for Easy DIY Abstract Art from Craft Pond. I think I've pinned it before, but seeing it pop up again was a sign! I knew that's what we were going to do today. Well at least, that's what the kids would do today, because I'm hooked on the camera and somebody had to take pictures right?!
I gave the kiddos some old 12x12 canvases that I had previously used and then repainted over in white to use again. They also got to choose their colors from all my old paints. What I didn't do was insist on adding white in the mix like the tutorial from Craft Pond did. When I do this for myself, I'm going to follow that tutorial more closely.


The other thing my kiddos didn't do was wash out their brushes. It was probably easier this way for them, but leads to more of an all over blend rather than just blending colors in certain areas.


They kept at it as long as there was still white canvas available to cover. After a while it looked like they were getting bored with painting, but after a little encouragement they finished up!


I gave the kiddos some old 12x12 canvases that I had previously used and then repainted over in white to use again. They also got to choose their colors from all my old paints. What I didn't do was insist on adding white in the mix like the tutorial from Craft Pond did. When I do this for myself, I'm going to follow that tutorial more closely.


They kept at it as long as there was still white canvas available to cover. After a while it looked like they were getting bored with painting, but after a little encouragement they finished up!


I let them both sign their paintings by writing their names. Well my 5 year old wrote his name. My two and half year old just left her mark!


Once dry we immediately hung them up for display! They are so proud of them! My son was even trying to sell his painting to his aunt for $60. He thought that would be enough to buy two Lego sets so it was a fair price! I can't wait to try this easy abstract painting for myself sometime with my own color choices. It was a fun quick project that I think we all will be doing again and again!
Tuesday, February 26, 2013
It Can't Rain All the Time
But if it did, I probably wouldn't mind. I love the rain! I love the smell of rain, the look of rain, and that's its generally cloudy and overcast when it rains. I think me and Seattle would get along great because of rain! Despite my love of it, rain and nice new shiny cameras don't really mix. But I wasn't going to let that stop me from trying to snap a few good photos today.
I'm trying hard to learn how to shoot in manual, as this is how I'm going to get the best photos. My problem right now is that I'm overwhelmed with terminology and numbers I don't understand. Each time I look up a new tutorial on what I want to do, I get more and more confused about how to work this camera! I'm really starting to think taking a photography class is not a bad idea.
So after much practice and many many adjustments to settings, here are the few photos I'm happy with today. I still wish I was able to get some better shots of the actual rain, but that will come with time, practice, knowledge, and probably more equipment!

Standing inside our garage I snapped these pictures of a leaf on the driveway. I was surprised to see such a pretty leaf so late in winter, especially since we don't have a single tree in our yard.

This little guy blew a long ways to end up on our driveway and be right where I needed for a nice picture today! It had stopped raining at this point, but the ground was still very wet, and the closeup brings out some beautiful colors in the wet concrete.

This picture is blurry I know, but it's because the focus was on the rain and not the trees in the background. There's almost a bokeh affect in the background as well. With more practice I'm going to figure out how to improve photos like this. I know what I want to do, just not how to make the camera do it yet!

This is a picture of my daughter's purse left on the back porch. She was not happy about it getting wet, but she was the one who left it outside! I like the reflection it created on the wet concrete.

Here's a closeup of the arm of a chair on our back porch. If you look closely you can see reflections in the rain about to drip off the arm.
These last two photos are the closest I was able to get to capturing the actual rain. It had picked back up a bit so you can see tiny splashes and the ripples made by the raindrops.


One other thing I want to point out on these photos is a free Photoshop action I used to sharpen and resize them for easy upload on the web. Most of my photos will end up on here or on Facebook. It'll be awhile before I'm doing prints or blowing any of them up for display.
I was amazed at how much faster they uploaded while still being crisp clear photos! You can check out the action for yourself here.
Monday, February 25, 2013
Shoot for the Moon
We had an amazing full moon last night, and well since our new camera is still so new and shiny and I can't put it down, I had to try my hand at taking pictures of it. How could you not want to take a picture of something so beautiful! Well, I quickly learned that despite my nice new shiny camera, I still couldn't take a good picture of the moon....at least not without a few adjustments first!
I'm brand new to this whole photography thing, having only owned a DSLR camera for a week, and slightly overwhelmed is an understatement for all that I have to learn about it! However, every new setting I play with and tricks I do learn get me really excited so I have to share them.
First off, here's a picture I took of the moon in all auto settings at 300mm on my zoom lens. I was less than impressed. It's a nice white circle, but it's not the moon I was looking for! And it's most definitely not the moon I saw while looking through the viewfinder to take that shot. I knew the camera could do better than this.


I'm brand new to this whole photography thing, having only owned a DSLR camera for a week, and slightly overwhelmed is an understatement for all that I have to learn about it! However, every new setting I play with and tricks I do learn get me really excited so I have to share them.
First off, here's a picture I took of the moon in all auto settings at 300mm on my zoom lens. I was less than impressed. It's a nice white circle, but it's not the moon I was looking for! And it's most definitely not the moon I saw while looking through the viewfinder to take that shot. I knew the camera could do better than this.

So I came back inside and hit Google. A quick "how to photograph the moon" search led me to this site, http://photographylife.com/how-to-photograph-moon, from Photography Life. Can you tell how much of an amateur I am? I read through the entire post, and then I popped open my camera's User Manual and started hunting down the settings it suggested.
After a few quick changes, I went back outside and snapped this photo.

Well now, that's much better! It's as close as I can get with my current lens, but I think it's pretty impressive considering the moon is over 200,000 miles away. It's clear I need to spend more time in manual learning the settings so hopefully I can do things like this in the future without Googling it first. Now, if only I didn't have to wait until April for my Nikon for Dummies book to be released!
Saturday, February 23, 2013
Weekend Wishlist
Some bunny is having a good morning! Here is Round Two of my Weekend Wishlist created on Polyvore. This is what I imagine as a most comfortable and relaxing weekend morning. I'd stay cozy in my pajamas, slippers on, curled up with a good book and a hot cup of coffee.
The awesome pajama pants are from Punjammies. I've had my eye on these for a while, and the story behind them is incredible! It makes me want to order everything on their site! Also, in every good morning there must be bunnies. Last year I bought an adorable bunny ring off Modcloth, but I'm secretly (or maybe not so secretly) obsessed with every bunny ring I find now. The cute little silver one below is from HideNSeek on Etsy.
The oh so sweet bunny template that sparked the inspiration for this wishlist was created by forever-young-ugne on Polyvore.

The awesome pajama pants are from Punjammies. I've had my eye on these for a while, and the story behind them is incredible! It makes me want to order everything on their site! Also, in every good morning there must be bunnies. Last year I bought an adorable bunny ring off Modcloth, but I'm secretly (or maybe not so secretly) obsessed with every bunny ring I find now. The cute little silver one below is from HideNSeek on Etsy.
The oh so sweet bunny template that sparked the inspiration for this wishlist was created by forever-young-ugne on Polyvore.


Interlude Design Aficionado Coffee Table Books – N
insideavenue.com
So how do you spend your weekend mornings? Do you stay comfy in your jammies or get up and get going?
insideavenue.com
So how do you spend your weekend mornings? Do you stay comfy in your jammies or get up and get going?
Thursday, February 21, 2013
Etsy Anniversary
Although the blog has been around for a few years now, today is my one year anniversary for my Etsy shop! I'm excited about the progress and direction the shop has taken in this past year. I feel like I got off to a rocky start and had a few bumps in the road along the way too, but especially in the last few months, I'm more excited than ever about Handmade by CJ!
One year ago today, I opened up my shop with one painting. When I had sat down to do this painting, thoughts of Etsy and sales were not on my mind. I was just so happy to be painting for the first time in a long time. After I finished this one, I did another, and another. And then I made a decision I wanted to share my art.

After a while I came to realize the importance of this painting was more than a sale. When the listing expired, I didn't renew it. This painting has been hanging on the wall in my kitchen ever since. It's a reminder of where I started, and where I want to go.
If you've followed the shop from the beginning, or even if you've only discovered it recently, you'll notice there are more than just paintings at Handmade by CJ. In the past few months, I've started adding my crochet projects to the shop, and I'm fairly certain that is the direction my shop will stick with.
As much as I love painting, it's much more difficult to stop and start in the middle of your work. It's more time consuming to clean up and put away the supplies, and drying, sealing, storing, and shipping are all more challenging. It's something I plan to keep up with for myself, and my kids (who definitely caught the painting bug!), but not where I want to spend my focus with Etsy.
So back to the crochet. I think this may be one of the best things I've taught myself to do. It's relaxing. It's easy to put away and pick back up right where I left off. As a mom of young children that's the priority. I can set my project down and return hours or even days later with no problems. I can't leave a painting like that, or else I'd be spending a fortune to replace my brushes all the time!

I'm enjoying the challenge of figuring out new patterns and techniques, working with different types of yarn, and truly feel I'm creating with my hands. Somehow I think when I chose the name "Handmade by CJ", I knew that it wasn't going to be an art shop forever!
With the crochet projects came the newest part of my shop, the doll fashion section, and the introduction of Maddie, my neo Blythe doll. She's a beauty and the perfect model. I really enjoy designing new hats and accessories for her, and for the shop. I even foresee in a few years, branching out into designing for American Girl when my daughter is old enough to have one. It's neat to think ahead, in terms of years, where my shop will be!
And lastly another question that's on my mind and one you may be asking as well based on my recent posts about photography, will Handmade by CJ add prints? The short answer is no. Although, that doesn't mean I won't open up a second Etsy shop when I feel my work is great enough to be sold. It's a time consuming hobby that I can already see getting in the way of my current Etsy venture! And I have years of experience yet to acquire!
In the meantime, I'll continuing posting some of my favorite photos here, as I learn new techniques both with the camera and in editing. I've also already chosen a name and logo for when that time comes! See, sometimes I plan ahead, and sometimes I don't!
One year ago today, I opened up my shop with one painting. When I had sat down to do this painting, thoughts of Etsy and sales were not on my mind. I was just so happy to be painting for the first time in a long time. After I finished this one, I did another, and another. And then I made a decision I wanted to share my art.

After a while I came to realize the importance of this painting was more than a sale. When the listing expired, I didn't renew it. This painting has been hanging on the wall in my kitchen ever since. It's a reminder of where I started, and where I want to go.
If you've followed the shop from the beginning, or even if you've only discovered it recently, you'll notice there are more than just paintings at Handmade by CJ. In the past few months, I've started adding my crochet projects to the shop, and I'm fairly certain that is the direction my shop will stick with.
As much as I love painting, it's much more difficult to stop and start in the middle of your work. It's more time consuming to clean up and put away the supplies, and drying, sealing, storing, and shipping are all more challenging. It's something I plan to keep up with for myself, and my kids (who definitely caught the painting bug!), but not where I want to spend my focus with Etsy.
So back to the crochet. I think this may be one of the best things I've taught myself to do. It's relaxing. It's easy to put away and pick back up right where I left off. As a mom of young children that's the priority. I can set my project down and return hours or even days later with no problems. I can't leave a painting like that, or else I'd be spending a fortune to replace my brushes all the time!

With the crochet projects came the newest part of my shop, the doll fashion section, and the introduction of Maddie, my neo Blythe doll. She's a beauty and the perfect model. I really enjoy designing new hats and accessories for her, and for the shop. I even foresee in a few years, branching out into designing for American Girl when my daughter is old enough to have one. It's neat to think ahead, in terms of years, where my shop will be!
And lastly another question that's on my mind and one you may be asking as well based on my recent posts about photography, will Handmade by CJ add prints? The short answer is no. Although, that doesn't mean I won't open up a second Etsy shop when I feel my work is great enough to be sold. It's a time consuming hobby that I can already see getting in the way of my current Etsy venture! And I have years of experience yet to acquire!
In the meantime, I'll continuing posting some of my favorite photos here, as I learn new techniques both with the camera and in editing. I've also already chosen a name and logo for when that time comes! See, sometimes I plan ahead, and sometimes I don't!
 |
| Captured by CJ Photography |
With all that being said, Happy Anniversary to Handmade by CJ. The shop has come so far, and still has so far to go and achieve! Today only, I'm offering my largest discount ever in the shop: 25% off your purchase with coupon code 'HAPPY1YR'. Don't miss out on this special offer if there's something you've had your eye on!
http://www.etsy.com/shop/HandmadebyCJ
I'm also still planning a giveaway in the coming weeks. I just need to find time to make the product before I kick it off! Stay tuned for that, and keep checking back to see what's new and exciting. I hope to always provide both!
Friday, February 15, 2013
Touch-Ups!
A few days ago I posted a look at some of the edited photos I took my first time ever using a DSLR camera. I suppose I did these posts backwards or should have just combined them, but today I'm going to show you the unedited shots and really a side-by-side comparison with the edited ones to show what I'm very slowly learning to do in Photoshop!
I've still been playing around with the edits, but here are a few of my favorites so far. I think it really shows that just a few small changes can clearly make a big impact on any photo.




I've still been playing around with the edits, but here are a few of my favorites so far. I think it really shows that just a few small changes can clearly make a big impact on any photo.
Original Picture on the Left --- Photoshop Edit on the Right


This first set was a fairly simple edit. I adjusted the levels and set an s curve. I also cropped it slightly to hide an ugly green ribbon hanging off the end of one of the branches. My editing skills aren't that great for actually removing items from photos yet!


This one was a little more fun. Along with adjusting levels and curves, I adjusted the color balance to bring out more red in the sand. I also adjusted the brightness/contrast to make the sky really pop out of the little pool of water.


Same thing here. I just love how much of a difference you can get with a simple curve. Adjusting the color balance can make just the right thing pop too. I feel like I'm transported to the beach here except that these are rocks instead of shells, and it's more mud instead of sand!


Here's where I got a little crazy and actually tried removing objects from the photo. I love the train tracks, but there were just way too many signs and things that stuck out. Some of them I just blurred and obviously cropped out the big billboard. The spot-healing brush helped with a lot of the little pieces, probably garbage littering the tracks.
I have so much still to learn, but I'm amazed how much much a few mouse clicks can already do! I'm off to look up some more tutorials and see what else I can do with these pictures!
Tuesday, February 12, 2013
Photography 101
So I've been hinting around about a new camera for a while now. We're pretty sure we've picked out the camera we want to buy, but this past weekend I got to test out lenses on a similar camera courtesy of an amazing friend. I had never used a DSLR camera before, and wow what a difference it is from the point and click cameras I'm used to.
We went to two different parks. It was late afternoon on a beautiful sunny but chilly day. I took over 130 pictures, but as it takes practice to focus and get a feel for exactly what to shoot, only about 20 of them were worthy of some editing.
When we got back I busted open Photoshop for the first time since college and played around. Here's a look at some of my favorites.
The first few pictures are at Sodalis Nature Park. This place is gorgeous year round! We did an amazing photo shoot here last fall. My friend was the photographer and my kids were the subject, but its hard not to take in the all the natural beauty here too!


We went to two different parks. It was late afternoon on a beautiful sunny but chilly day. I took over 130 pictures, but as it takes practice to focus and get a feel for exactly what to shoot, only about 20 of them were worthy of some editing.
When we got back I busted open Photoshop for the first time since college and played around. Here's a look at some of my favorites.
The first few pictures are at Sodalis Nature Park. This place is gorgeous year round! We did an amazing photo shoot here last fall. My friend was the photographer and my kids were the subject, but its hard not to take in the all the natural beauty here too!


The lake was mostly frozen over that day!

On the way home we pulled over beside these tracks and snapped some more pics. There's just something appealing about train tracks that I can't describe!

The rest of the pictures are from Hummel Park. There are so many wonderful things to photograph here! The budding trees and the birds were my favorite!


If I wasn't already sold on wanting the 55-300 mm lens, this next picture did it for me. I wish I had a way to explain how far away we were from this sign in the woods. From the naked eye all you could see was a spot of yellow on the tree. We were quite a ways away and on the other side of a creek. It's amazing the distance and clarity that lens could do!


I think for my first time ever using a DSLR, and for the first time using Photoshop in years, these turned out pretty good! I can't wait to go out and do it again, and next time I might even have my own camera!
Subscribe to:
Posts (Atom)