Showing posts with label Low Carb. Show all posts

Monday, May 20, 2013

Weight Loss Progress Report

I have no clue what week I should be on, so I'm leaving that number off this one.  I can't tell you how many times I've stopped and restarted dieting in the last few months.  There's always something that seems to throw me off course (cough cough...Chinese takeout...cough cough).  When I initially started these reports again, I was doing them at the beginning of the week, and it was a week I never made it through.

Well this post is coming after a week of great progress and sticking with the plan!  I have been doing Atkins' Induction all week long.  I've been on MyFitnessPal daily logging my food and exercise, although that exercise has only consisted of mowing the lawn and a couple of walks so far.  I plan on adding back in my regular workouts.  P90X here I come!!

I know the big drop at the beginning of Atkins is losing water weight and throwing your body into Ketosis.  That means my body is burning fat for energy.  By not eating carbs, which your body would normally burn first, I'm forcing it to burn my body's fat stores instead.  So without further ado, the results of my first week back on Induction are:


One Week!!!  Seven Pounds!!!  (Well 'technically' it was 6.6 lbs, but MyFitnessPal rounds up.  Close enough right?)  Why oh why does it take me so long to realize this works?  I did it before, and I'm doing it again.  I was so proud of myself this week for maintaining my self control.  I had an opportunity for my favorite Chinese takout and I didn't take it.  I also went to a child's birthday party, and I didn't eat anything there!  There were many times I wanted to sneak into the pantry and devour some cookies, but I didn't!  And it paid off!!

I'm looking forward to the week ahead and continued success.  I already know of a few bumps in the road, but I'm planning ahead to get through them easily.  It's important to plan to know where your next meal is coming from or at least know what it is!


I've been exploring my favorite low carb recipe website for ideas.  The recipes on Linda's Low Carb are fantastic.  I've had a link to her website in my "Helpful Links" section for years now.  I love how it is broken down into categories so you can easily find a recipe for whatever meal or main ingredient you are looking for.  Some of my personal dinner favorites are the "Easy Cheesy Chili Chicken" and the "Enchilada Chicken Paillard".


Breakfast can be a little tricky.  I get in the habit of having the same thing over and over which can burn you out pretty quickly.  My go to breakfast is two eggs, two strips of bacon, and spinach with my coffee.  This is an improvement over my old breakfasts however which literally just consisted of coffee.


I did try something a little different one day this week.  I made a pizza omelet.  It was pepperoni, mushrooms, banana peppers, and spinach in a two-egg omelet topped with a sprinkle of mozzarella cheese.  And it was YUMMY!


I had a salad for lunch almost every day last week, but I didn't always use the same ingredients.  Sometimes it was iceberg lettuce, and sometimes it was romaine.  The one pictured above was topped with a sliced grilled bratwurst leftover from the night before.  I topped one with crumbled bacon and tomato for a very BLT tasting salad.  My favorite salad was what I had yesterday for lunch before heading off to that birthday party.  It kept me full and I didn't even feel like snacking while I was there.  I had a romaine lettuce salad, topped with Cesar dressing, mozzarella cheese, pepperoni, banana peppers, and tomato.  It was my version of an Italian garden salad I once ordered from Donato's pizza, and it was delicious!!

So I've got a plan in my head, but I'm going to write it down.  On paper it always feels more official.  I like checking things off and staying on track.  I'm going to take this one week at a time, one day at a time really, but always looking ahead to my goal.  Now if you'll excuse me, I need to go order some more bacon from the butcher's!


Wednesday, July 11, 2012

French for Kids - Colors and Quiche

For day two of Introduction to France week, we're delving into art and French cuisine.  After talking about the Parisian landmarks the day before, we spent a little more time on day two discussing the Louvre.  I once again hit Google for some great pictures of the famous building and some quick facts.  Did you know the Louvre is the most visited art museum in the world? (Hopefully I can be counted among those visitors one day!)

Next, I wanted to expand our French vocabulary to include colors.  I've hunted around for some French flashcards.  Everyone seems to carry Spanish ones, but French is incredibly hard to find.  And when I've found them, they just weren't at a price I was willing to pay.  So I decided to make my own.  I pulled out a few of my sons crayons and some blank note cards and got to work.  They're simple but they work just fine!


I'm contemplating making another set with only the French translation on there, but for now I also want my son to get used to recognizing the English words for these colors so I included both.  Practice these a few times, repeat often, and they'll have them down before you know it!

After we'd discussed the art museum and our colors, we had to put them to good use.  I thought about letting the kids paint, but since I had just cleaned up and organized the arts and crafts supplies, I decided to put a bunch of scrap construction paper to use instead.  I found some helpful videos that I could use to explain impressionist art very basically to kids.  This video is a quick background on Impressionism and Claude Monet:  http://www.ehow.com/video_12221608_make-impressionist-art.html.  I also found this great tutorial for teaching impressionist art using torn paper:  http://www.ehow.com/video_12222796_create-torn-paper-impressionist-art.html. 


Then came the really fun part.  The kids took the scraps of construction paper and torn them into a bunch of small pieces.  While we were doing this, I kept repeating the names of the colors in French for the color of construction paper they were using.


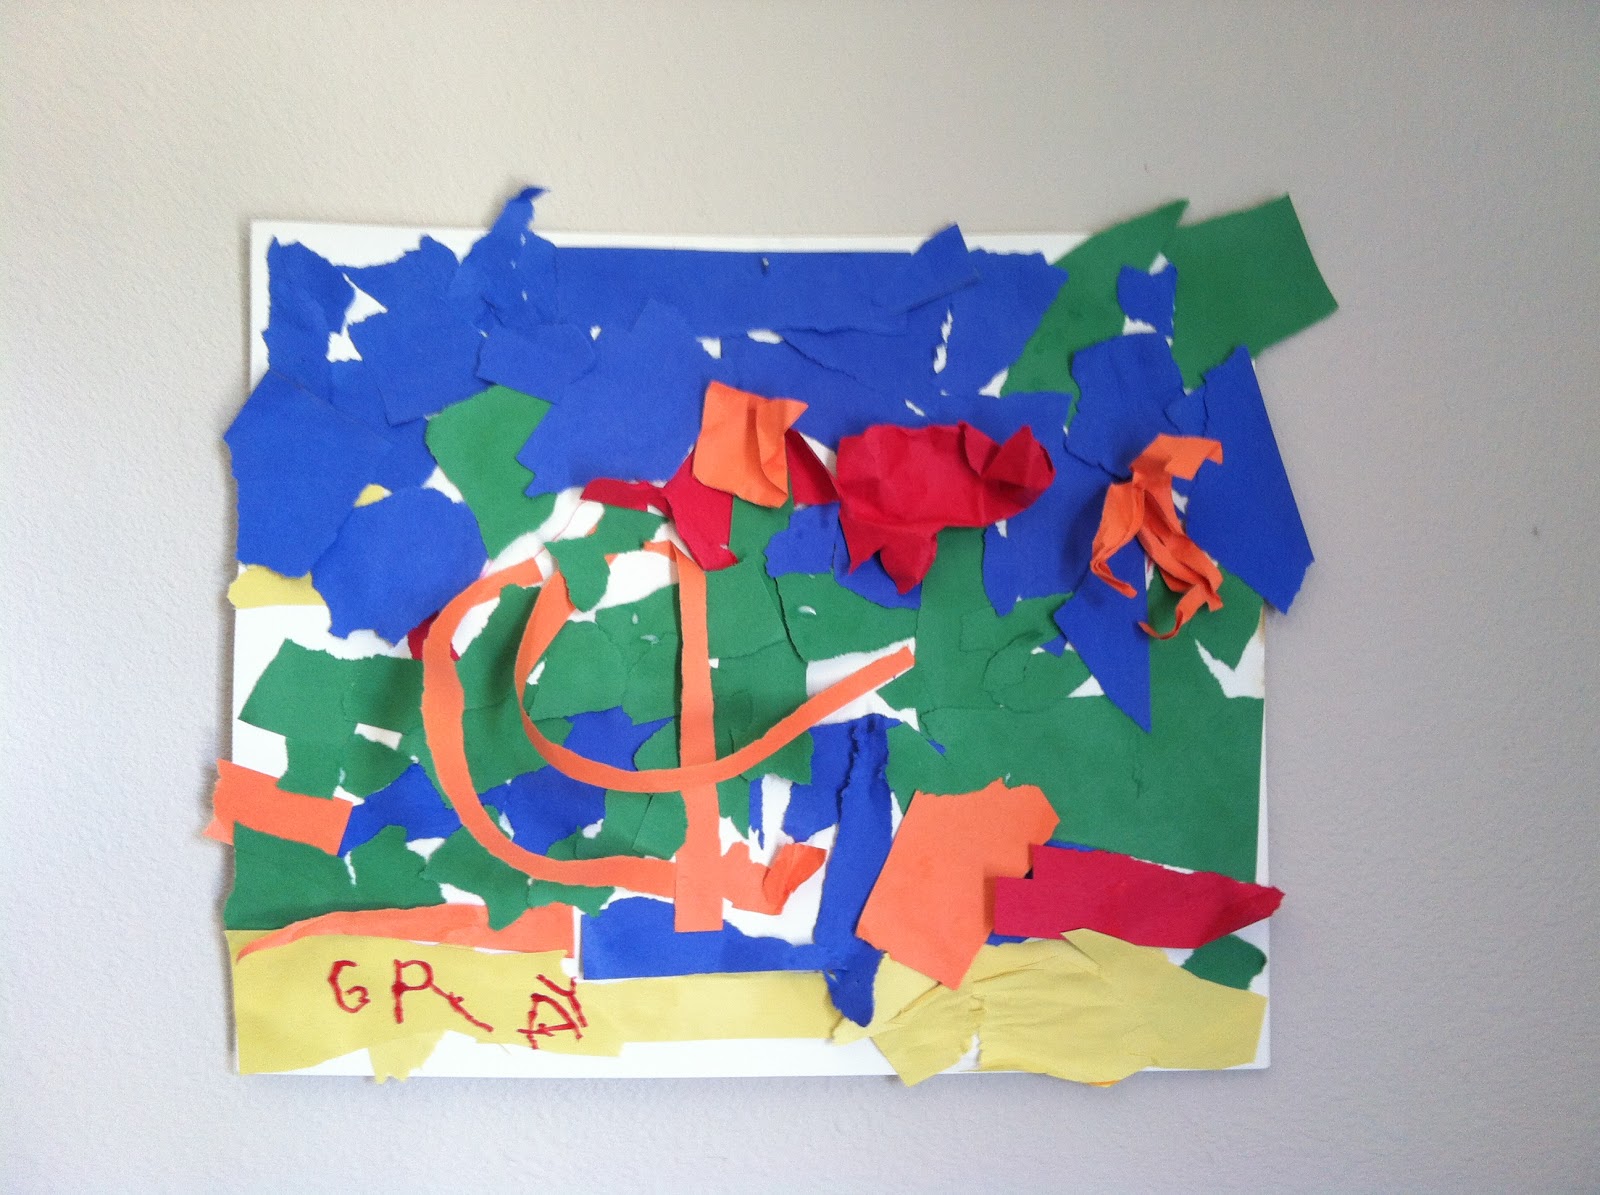
Once again, this activity was so fun and easy that my 2 year old could join in!  I asked my son to create a picture of flowers.  That was the only instruction I gave him besides "glue the pieces onto your paper".  And here's what he came up with!  He explained the juane (yellow) is for the yellow grass we have right now, and the blue near it is water that makes it turn green.  There are three flowers (he says they're roses!), and the long orange strips are tunnels and bridges for cars.  The blue at the top is of course the sky, and he mentioned that the green in the sky was just strange! 


I love it!  So it's now hanging in our kitchen as well.  French week turned out to be a huge hit, and this was only day two!!  


Quiche!

For lunch we made quiche which is awesome!  Way back in high school, one of my favorite things about taking French class was the French club breakfasts.  I think I've been making quiches ever since.  They're are simple, very easy to customize with whatever you have on hand, and so delicious!  

Our quiche was a chicken and broccoli quiche (with some zucchini mixed in too, hey use what you've got on hand right?).  I sort of followed this recipe:  http://www.genaw.com/lowcarb/broccoli_quiche.html from one of my favorite low carb websites.  Yes it's crustless, but I still call it quiche.  We can still learn about French culture without the extra carbs!


I diced the onion with about half of a zucchini and sauteed with garlic for a few minutes, until the onion and zucchini just start to become tender.  Then I added about a cup of leftover shredded chicken and the cooked broccoli.  I mixed half of the cheese into this mix and poured it into the pie plate.  Then mix the cream (I used whole milk and it turned out just fine), eggs and seasonings and pour evenly over the chicken and vegetables.  Top with the remaining cheese!   


I pulled it out of the oven after 35 minutes and let it rest for about 10 minutes.  It was perfectly set and absolutely yummy!

In case you missed the first day, here's the link to our Introduction to France week activites.  And don't forget to check out the day three activities at Weather and Counting in French.


Friday, August 12, 2011

Mariachi Chicken Flatbread Pizza

Something we became addicted to before going low carb was Donato's thin crust Mariachi chicken pizza.  They are the only pizza place that delivers to our neck of the woods, but I think I might drive an hour just to pick up one of them!  The pizza is topped with chicken breast, roma tomatoes, and sliced jalapenos.  Three simple ingredients that combined with the delicious sauce that Donato's uses create a very divine flavor!  Also, they deliver it with sour cream which gives the perfect cool down to each bite of this spicy pizza.

Although we have treated ourselves to this pizza once since going low carb, it is by no means acceptable on our "diet".  I knew it would be difficult to recreate the exact flavors, but making a lower carb version was a must.  Today I think I came pretty darn close!  Inspired by a piece of leftover chicken breast in the fridge, I grabbed the spaghetti sauce, a fresh tomato, the jar of jalapenos, and shredded cheese.  And of course the bed for all of those delicious ingredients,  the Flatout wrap!  The size and thickness of these wraps makes them perfect for individual pizzas, and at only 6 net carbs, they're totally worth it!


The entire recipe has approximately 15 net carbs, but that will vary depending on the sauce you use.  I sliced the finished pizza into 6 pieces and served it with a tablespoon of sour cream.  You could easily save on the carbs by sharing this so two people would get 3 pieces each and serve a small salad with it (more veggie carbs!).  I, on the other hand, devoured the entire thing by myself.  It looked beautiful and tasted even better!  I will definitely be making another one of these again soon!


Mariachi Chicken Flatbread Pizza

  • 1 Flatout wrap
  • 1 tsp olive or canola oil
  • 1/2 cup marinara or pizza sauce
  • 1 chicken breast, cooked and diced
  • 1/2 roma tomato, diced
  • 1-2 Tbsp jalapeno, diced
  • 1/4 cup shredded Mexican style cheese
  • dash red pepper flake and/or Italian seasoning (optional)
To prepare the wrap for it to become a sturdy pizza crust, preheat the oven to 350 degrees.  Brush both sides of the wrap with a little olive or canola oil and place directly on the oven rack for about 5 minutes, flipping once halfway through.  That crips up the wrap just enough for it to hold up well with sauce and all the toppings, even when sliced into pieces.  After the 5 minutes, pull the wrap out of the oven and place on a foiled line baking sheet.  

Assemble the flatbread pizza by spreading the pizza sauce or marinara, whichever you choose, across the flatbread leaving a small edge of crust all the way around.  Next add your toppings in an even layer over the sauce, and finish off with the cheese.  I like to sprinkle a little red pepper flake and Italian seasoning over the cheese as well.  Return the pizza to the oven on the baking sheet for about 6 minutes until all the toppings are warm and the cheese has melted.


Saturday, July 23, 2011

Trying Jicama

In my quest to find a suitable substitute for potatoes I've tried using several different veggies as replacements in my favorite potato dishes.  Most turned out acceptable, delicious even, but none of them truly tasted like their real potato counterparts and therefore were always lacking a little.  And then I stumbled across the jicama!

What an amazing vegetable it turned out to be.  I had to Google it to find out what it even looked like so that I would know what to look for at the grocery store.  My best description of a jicama is that it is the love child of a potato and a turnip!  I had never paid attention to this vegetable before.  I imagine I always walked right past it to grab a sack of potatoes or carrots before.  However, this will from now on be a veggie I pick up whenever I find them at the store.


I've seen many recipes calling for jicama, most of them were salads using it raw which never sparked my interest.  However when I found a recipe on Food Network's website for jicama matchstick fries, I finally had a reason to give this veggie a try.

The first thing I did was peel and slice the jicama.  I recommend a very sharp knife and being super careful!  I was a little worried I might lose a finger or hand because this baby was pretty darn tough to peel!  The peel is much tougher than that of a potato and seemed thicker too than the peel of a turnip.  Slice off the root end to give yourself a flat base to rest on your cutting board.  That makes it very easy to slice the rest of the jicama.


When I finished slicing it up into thin wafers, I stacked a few of the wafers at a time and sliced them into thin matchstick like pieces.  I was prepared for this to take quite awhile as I have made sweet potato matchsticks many times in the past and those suckers are hard to cut through!  However once you get through that tough peel off the jicama, this is actually a pretty soft juicy vegetable.  Raw it tastes sweet, almost like an apple or a pear which is no wonder I saw it listed in so many yummy salad recipes.


I used a paper towel to pat dry all the matchsticks once they were cut.  Then it was time to preheat the oil and  prepare the seasoning.  If you have a deep fryer, I'm sure that would work great for these, but since I don't I just used a big thick skillet.  I used the same seasoning that I used to put on my sweet potato matchsticks which simply consists of ground black pepper, seasoned salt, and nutmeg.  You could also add a little cayenne if you like a kick to your fries.


I fried them in batches.  I think mine took at least 4 batches for 1 full jicama.  Be careful when placing these in the hot oil because there seems to be a good amount of moisture in this veggie.  I like to put a handful on a big slotted spatula (or a spider if you have one) and lower it down gently into the oil.  This is also the best way for removing them too.

Pictured here on the left is the first batch done and draining on paper towels (minus all the ones I taste tested).  On the right is a picture of all of the matchsticks once they were done.  I toss the seasoning on each batch as they come out of the oil, and I kept them warm in a 200 degree oven while I finished frying the rest.


I really enjoyed these jicama fries.  They don't seem to get as crispy as typical potato fries, but they were quite yummy.  The kids both ate them, and Gray has refused on more than one occasion the turnip fries I've made.  They remind more more of "onion straws" that I've seen several restaurants serve as a garnish on steaks or burgers than fries but were still very much what I was looking for to pair with a nice bacon cheeseburger for dinner.


I will definitely be trying out some more recipes with this awesome veggie.  And for anyone interested, a half cup of raw jicama is only 2.5 net carbs!  I already have ideas for how to turn this into cinnamon apples or even apple pie and to try a few more variations on fries or hash browns.  I believe jicama is truly a more versatile food than a potato and am so glad I finally gave it a try!  I hope you all will give it a try to if you've never had it before, and if you have please share your favorite jicama recipes!


Saturday, July 2, 2011

Flax Seed Waffles

I am all about making nice big breakfasts for the family on weekends.  Before we went low carb, those breakfasts usually included bacon, eggs, and toast or biscuits and gravy.  Now we typically have bacon (or sausage) and eggs, without the toast of course, for breakfasts during the week.  I needed something different for a special weekend breakfast and someone on the Atkins page mentioned flax seed waffles.  I absolutely love waffles, and they sounded like the perfect treat.

The only problem turned out to be finding a recipe!  Most of the recipes I came across only had a small amount of flax seed in them and consisted of primarily white or wheat flour, not exactly low carb!  It took about a half hour of Google searches before I finally came across one that used a combination of flax seed and soy flour.  Finally something I could work with!  The recipe, found here, is called "flax seed soy Belgian waffles".  I only have a regular old fashioned waffle maker, but I think they turned out just fine.  And when I say "old", I'm not using that term lightly.  This thing was given to me by my mother who bought it in 1971!  Despite being so old, it was still new when she gave it to me.  She hadn't used it once in 40 years!  I've used it a handful of times, but I think now that I've discovered low carb waffles this thing will be getting more of a workout.


The recipe for the waffles was quite easy.  Just be sure to make the batter before you preheat your waffle maker.  This gives the batter enough time to thicken up, although this particular batter is pretty thick to begin with.  I'm not going to post the original recipe here because it's not my recipe, but I did make one big change. The original called for one cup of buttermilk or suggested making a sour milk out of vinegar and low fat milk.  Trying to stay carb conscience I substituted the milk for heavy whipping cream and used a teaspoon of lime juice to create a sour milk, letting the mixture curdle before using it in the recipe.  This creates a reaction with the baking soda called for in the recipe helping to create that light fluffy interior of the waffles.  I only used lime juice because that's all I had on hand this morning.  Lemon juice or vinegar would work, but don't think I'd use vinegar because I wouldn't want that flavor to come out in the waffles.

The original author of the recipe mentioned that the waffles had to cook longer after the timer went off (of light went out) on the waffle maker in order to get crisp enough.  I didn't have that problem, mine were done when the light went out.  These waffles came out crispy on the outside and soft on the inside, just like they're meant to be.  They actually had a surprisingly light mouth-feel and were a bit crumbly.  Most of the waffles I have made in the past didn't crisp up enough in this waffle maker, and I ended up putting them in the toaster to get them crisp.  I didn't have to do that with these though!  


With two pieces per person I had five servings of waffles.  Each serving comes out to 5.6 net carbs.  I count the heavy whipping cream as 1 net carb a tablespoon even though the package says it has 0.  I'm a little skeptical of some hidden carbs the particular kind I buy has because the calories and the fat content just don't add up right.  If you find one that's truly 0 carbs, then these would be only 2 net carbs a serving!  For those of you following Atkins, this really should be an OWL and beyond recipe only because of the flax seed and soy flour, however some would argue that it's safe for extended induction (without the blueberries of course).  The waffles pictured here are topped with a quarter cup of blueberries and a sugar free maple syrup making the grand total for this breakfast 10 net carbs.  That's about 9 more than I'd normally have for breakfast, but they were so worth it.  And since I'm just a few pounds shy of moving to the pre-maintenance phase of Atkins I can afford these carbs (especially when they're this delicious).

I'm anxious to play around with this recipe and try some different flavors like cinnamon, chocolate, and even strawberry.  I will probably also try this with whole milk instead of heavy cream next time as well.  The batter was very, very thick with the heavy cream and counting 1 carb per tablespoon actually came out to more carbs than there are in a cup of whole milk.


Wednesday, June 29, 2011

Low Carb Lasagna

I have always liked lasagna, but I never realized how much until I started making a low carb version of this classic dish!  It is so simple, and there's no dealing with those wacky lasagna noodles, either cooked or uncooked.  I've made this a handful of times now and felt it's finally time to share my new favorite recipe!

The inspiration from this recipe once again came from my favorite low carb website, Linda's Low Carb Menus & Recipes.  Her lasagna recipe uses an 8x8 baking dish and makes 6 servings.  Today I wanted to make a bigger version.  I love the leftovers just as much as eating it for dinner!  I used a 2.75 qt casserole dish, however one slightly larger would work as well as this comes out as a pretty thick lasagna.  Mine also made 8 servings although I think it could easily do 9 or 10 servings especially if you use a larger baking dish.

I think the ingredient that makes this lasagna taste so darn good is the Italian sausage.  I used a mild version but it still just gives the flavor a special kick that other regular lasagnas are lacking.  The most unique ingredient is what puts this lasagna in low carb status.  Instead of using pasta between the layers of the lasagna, I use thinly sliced oven-roasted deli turkey breast.  When I first saw Linda's recipe using the turkey breast I was intrigued.  I was also really unsure about how that was going to work out, but it's fantastic.  The turkey really works well with all the other flavors in the lasagna, and it also does it's job of providing a separation between the layers.

Low Carb Lasagna

  • 1 lb ground beef (I use ground chuck)
  • 1 lb ground Italian sausage
  • 1 cup tomato sauce*
  • 1 15 oz container of Ricotta cheese
  • 2 eggs
  • 1 cup of wilted spinach leaves (about 3 cups fresh)
  • 1/4 tsp pepper
  • 1/4 tsp garlic powder
  • 9 thin slices of deli turkey breast
  • 8 oz shredded Mozzarella cheese
  • 1/4 grated Parmesan cheese
*I use Hunts Garlic and Herb tomato sauce.  It comes in a large can and is only 5 net carbs a serving (1/2 cup).  It's the most affordable low carb tomato sauce I have been able to find at the store, and it's also quite tasty!  You could make your own sauce or use any sauce your prefer, but note that you will have to adjust the carb count accordingly!

Directions:  Brown ground beef and Italian sausage together in a large skillet until done.  Drain grease and return to pan.  Stir in tomato sauce.  In a separate pan with lid wilt spinach leaves in 1/4 cup of water.  Drain any excess water and allow to cool slightly.  Mix Ricotta cheese and eggs in a bowl until blended.  Stir in pepper, garlic powder, and spinach.

Layer the lasagna in at least a 2.75 qt casserole dish in this order, from the bottom:
  • 3 slices turkey breast
  • 1/2 meat mixture
  • 1/2 Ricotta mixture
  • 1/2 shredded Mozzarella
  • 3 slices turkey breast
  • remaining meat mixture
  • remaining Ricotta mixture
  • 3 slices turkey breast
  • remaining shredded Mozzarella
  • grated Parmesan on top
Bake in a 350 degree oven for approximately 40-45 minutes.  Let stand for at least 5-10 minutes before slicing to serve.  

 Left:  Lasagna before going into the oven      Right: Lasagna resting after baked

The lasagna can be baked immediately or covered and stored in the fridge or freezer.  I prepared it early in the day and put it in the fridge until ready to bake for dinner.  I have also prepared this before and left in the freezer for several days until I wanted an easy dinner!  However, if you do freeze it, move it to the fridge the day you are going to bake it to allow ample time to thaw.  Also leave it on the counter for about 30 minutes before baking it to allow the casserole dish time to adjust to a warmer temperature.  Also, as hard as it might be, don't skimp on the resting time once the lasagna is done baking.  Not only does it allow the lasagna to cool slightly so it's easier to eat, but it helps the lasagna to hold its shape better once it's cut into servings.

For 8 servings, this lasagna is 8 net carbs a serving.  If you made it into 9 servings it would 7 net carbs, and if you wanted to even make it 10 smaller servings, it would only be 6 net carbs a serving!  This dish would be perfect for having friends over for dinner and paired with a great salad it's a fantastically filling and delicious low carb meal.  I would bet even non-low carbers would like this spin on lasagna!


Wednesday, June 15, 2011

Low Carb Journey Update

I've been doing low-carb for about two months now.  I do a weekly weigh-in and check my measurements every Monday morning and track them in a spreadsheet.  It is incredible to watch the changes in such a short period of time.  I feel better and feel like I look better than I have in nearly 8 years (minus the stretch marks of course, but I'm learning to deal with those).  I have more energy.  I crave activity and sunlight, instead of sugar and starch!

Everyday I'm finding new ways to make my old favorites into new healthier favorites!  And the results are tasting so much better than I ever thought!  Last night I made a recipe called enchilada chicken paillard.  I've been making green chili and chicken enchiladas lately with low carb tortillas but find that we don't even want the tortillas now, low carb or not.  I found this recipe on Linda's Low Carb website, my new favorite place to check out before I go to the grocery store and when I'm not sure what to make for dinner.

I didn't cook the chicken the same way her recipes suggests.  I instead put some chicken breasts in the crock pot with a little salsa and let them cook for several hours.  I then let them rest for about 5 minutes before shredding them.  I love shredded chicken and to me that's what enchiladas are all about!  I also didn't have any red peppers, but I think I'm the only one around here that would eat them anyway.  Instead of the peppers, I served the paillard over a bed of shredded lettuce and topped with some fresh chives to make sure  I still got all my veggies in!  By the way, paillard is a French culinary term for quick cooking or pounded piece of meat.  I had never heard of it before so I hit up Google for the definition.  My method for this recipe definitely negates the "paillard" so I'm just going to call them faux enchiladas, or something like that.  I'm open to good suggestions!


Regardless of what you call it the result was delicious!  I think I will always make enchiladas this way from now on!  And in case your counting, it's 6-7 net carbs depending on how big your serving is.  I think we had about 5 servings in the whole recipe.  I can't wait for lunchtime today to eat the leftovers!

Back to my journey (lets divert our minds from that yummy picture for just a second).  I am so grateful for finally jumping on this bandwagon.  I honestly feel like it's the best thing I could do for my health and my family!  My kids, who are both still so young, are going to grow up knowing how to make healthy food choices!  I am doing my best to put a stop to the diabetes that passes down from generation to generation in my family.  It won't make it to me!

I want to thank everyone that encourages me through these changes.  I want to remind everyone however that this is not a diet; this is not something I will be doing for a couple months to lose a few more pounds and then give up.  This is a new lifestyle.  As I learn more about how my body handles certain foods, I will be able to eat more and more carbs each day.  I may even have a cheat every now and then.  But this is my life from here on out.  And it's only going to get better!


Tuesday, June 7, 2011

Chocolate Peanut Butter Flax Meal Cookies

I know I've said this before but I have to say it again.  I have a serious problem with making a recipe as-is!  I always feel like there is something I have to add, take away, or change in a recipe.  Sometimes these little experiments can go horribly wrong, and sometimes (this being one of them) they go beautifully!  There is nothing more exciting than getting creative in the kitchen, except maybe indulging in the yummy results!


So here is the recipe I stumbled across on Linda's Low carb website:  Cocoa Flax Cookies.  I had actually been looking at all her cheesecake recipes because I picked up some cream cheese at the store today and really wanted to try one.  Many of them call for the sugar-free Da Vinci syrups just like this cookie recipe, however I have not gotten around to buying any of these yet.  I wish I could go buy every flavor complete with pumps and setup a syrup bar on my counter.  I'd spend all day making new and fabulous concoctions!  Alas, I haven't done this (yet!) so I had to get creative.  I remembered I did have some Hershey's sugar-free chocolate syrup in the fridge.  I've only ever used it to make chocolate milk for my son or on top of some Breyer's Carb Smart ice cream.  I didn't even know if you could bake with it!  But I gave it the ol' college try!

As I was stirring the chocolate syrup into the mix, I started thinking about one of my favorite cookies I haven't had since I started a low carb diet, no-bake cookies!  In fact I haven't had anything with oatmeal in it.  Anyway, I thought maybe I could make these taste like no-bake cookies so I ran to the pantry for my peanut butter (all natural, low sugar).  I added only a tablespoon to the batter, however I may try adding a little more next time.  After they were in the oven, I also thought about adding vanilla extract.  That's another ingredient in no-bake cookies and I think it would enhance the flavor even more.  It was too late to add it to this batch, but I'll definitely be making these again so I will do that next time.

This recipe is so fast and easy.  Almost too easy!  I think it will definitely be one of my go to snacks.  Flax meal is so filling and each cookie is only 1 net carb!  I can have two or even three and still be good!  I think grabbing one of these between meals would be enough to last until it was time to eat again or these would even be a quick fix for that late night need-to-snack-before-bed craving!

Each cookie is 50 calories, 3g of fat, 4g of carbs, 3g of fiber, and 3g of protein.  They come out really dark, mostly because of the chocolate syrup, but they are incredibly light.  They actually taste more like a bite of brownie than a cookie.  My son has been calling them "donut cookies" and keeps asking for more!

Chocolate Peanut Butter Flax Meal Cookies


Ingredients:
  • 1 cup golden flax meal
  • 1/4 cup unsweetened cocoa powder
  • 1/2 teaspoon baking powder
  • 1/2 teaspoon baking soda
  • 2 eggs
  • 6 tablespoons sugar-free chocolate syrup
  • 1 tablespoon natural peanut butter
Directions:

Preheat oven to 350 degrees.  Add flax meal, cocoa powder, baking powder, and baking soda to a medium bowl.  Whisk thoroughly.  Add eggs, syrup, and peanut butter.  Stir well with a spoon.  Drop batter by teaspoon fulls onto a greased baking sheet.  Bake for 7 minutes.  Makes 16 cookies.
*Recipe adapted from Linda's Low Carb

Update:  Adding an extra tablespoon of peanut butter and 1 tsp of vanilla really increases the flavor of these cookies!  I didn't recalculate the nutritional information, but a couple extra carbs between 16 (or even more if you make them a tad smaller) cookies, doesn't change it much!

Low Carb Buffalo Chicken Tenders

Oh the joys of finding new ways to make things!  One of the house favorites around here is buffalo chicken strips.  Breading the chicken for me meant double dredging the chicken in seasoned flour and dipping in a mixture of egg and milk.  Then I would fry the chicken, brush it with buffalo sauce, and then bake it in the oven.  So juicy and delicious!  However flour, at least the all purpose kind, and milk is sort of off limits on a low carb diet so I needed to get creative.

My new favorite website gave me some inspiration.  Linda's Low Carb has a recipe for tuna patties that I've made before.  I thought they were pretty good, but I'm not a fan of fish so I decided to make them with canned chicken instead.  Definitely the preferred method for me!  Then I thought why not turn these into buffalo chicken patties?  I added some hot sauce and other spices to the mix before frying and also served with a little splash of hot sauce on top and ranch dressing for dipping.  They were okay, but definitely not satisfying the need for my homemade buffalo chicken.  I really missed that breaded chicken texture and these patties really have too much of an egg texture.

I went back to Linda's website and started looking at all the chicken recipes again.  Finally I came across one I thought could work.  She has a recipe for breaded chicken cutlets that stood out.  The picture of the chicken looked wonderful with a nice crispy crust perfect for brushing on a little buffalo sauce!  I thought about just trying the recipe as-is for dinner tonight, but I'm out of Parmesan cheese and I really just wanted to have buffalo chicken anyway.  I want to give her all the credit here because I would have never considered what she used for breading until I saw this recipe!  Please check out her site and other recipes for more great low carb dishes!  Again I took inspiration from her recipe but made several modifications.

Low Carb Buffalo Chicken Tenders
  • 2-3 Boneless skinless chicken breasts, halved horizontally and sliced in tenders (or save yourself the time and use already cut chicken tenders)
  • 2 1/2 ounces pork rinds (I used a plain, but I think hot and spicy would be good for this too)
  • 1/2 teaspoon paprika
  • 1/2 teaspoon black pepper
  • 1 teaspoon onion powder
  • 1 teaspoon garlic powder
  • 1/2 teaspoon cayenne pepper (add more or less depending on how spicy you like your food)
  • 1 egg
  • oil for frying (I use canola oil and enough to cover the pan about 1/4 inch)
Buffalo sauce
  • 2-3 tablespoons butter
  • 1/4 cup hot sauce
  • 1 teaspoon Worcestershire sauce
Makes 4-5 servings

To make the breading, combine the pork rinds and spices in a food processor and pulse until all of the rinds are broken up into small coarse pieces.  Transfer to a plate or shallow dish.  In a separate shallow dish whisk the egg till frothy.  Linda's recipe only uses the egg white for this.  I personally hate wasting a perfectly good egg yolk, plus I needed the extra liquid it gives so I used a whole egg.  Heat oil in a large skillet.  When oil is ready, dip chicken tenders one a time into the egg and then coat with the breading.  Fry in skillet 4-5 at a time (depending on the size of your skillet) for a few minutes on each side.  Do not overcrowd the skillet as this reduces the temperature of the oil and the chicken will take longer to cook.  When tenders are done transfer to a plate lined with several layers of paper towel.  Repeat until all of the tenders have been cooked.  I had about 14 tenders from cutting up 3 chicken breasts.

Before starting to fry your last batch of tenders, preheat the oven to 425 degrees.  Melt the butter in a small saucepan.  Add the hot sauce and Worcestershire sauce.  Simmer buffalo sauce on low while finishing cooking the chicken tenders.  Normally I would have added corn starch to this sauce to thicken it up, but since that's high in carbs I simply omitted it.  It doesn't change the flavor, just the consistency of the sauce.

When all the tenders are done, arrange in a single layer on a baking sheet (can also line with foil for easier cleanup).  Brush each tender with the buffalo sauce.  Transfer sheet to oven for 5-10 minutes.  I use this time to prepare or finish preparing whatever sides I am serving with the buffalo chicken, in tonight's case we had a side salad and Brussels sprouts.  I also used to serve my buffalo chicken tenders with a nice big dipping cup of ranch dressing, however I chose to eat them plain tonight and had 1 tablespoon of ranch dressing on my side salad instead.  I got the same affect for a lot less carbs!

Buffalo chicken tenders just out of the oven

I was pleasantly surprised at how good these turned out.  They are definitely not as thick as the high carb version I used to make, but I actually think this breading held up a little better than the flour breading when the buffalo sauce is added.  I was also really surprised that they didn't taste like pork rinds, especially because I used half a bag of them!  In fact, unless someone saw you add the pork rinds to the food processor, I don't think they'd ever be able to guess that's what these were made with.  

It's difficult to estimate the calories per serving in this recipe, but the great thing about low carb is that we don't need to worry about those anyway!  It really depends on how many tenders you make out of it and of course how many of them you eat.  Regardless, count about 1 gram of carbs per serving (approximately 3 tenders).  And as always, enjoy!!

Sunday, May 29, 2011

Chicken and Vegetable Alfredo

I know what you're thinking...Alfredo!  That means you had pasta right?  You can't do pasta on a low carb diet!  Well, no...yes....sort of.  I had considered purchasing some of the Atkin's brand pastas or Dreamfields which claim to be low carb, but when I discovered shirataki noodles I don't see any reason to try anything else!  These are the same noddles I used in my pad thai recipe, but they come in a few different forms.  For tonight's dinner I used the angel hair, although I can see it being very good with the spaghetti or fettuccine versions as well.  The noodles really just take on the flavor of whatever you use them in and they have the same texture as their regular pasta counterparts.


Low Carb Chicken and Vegetable Alfredo

  • 1 1/2-2 boneless skinless chicken breasts
  • 1 package shirataki noodles
  • 1/2 cup chopped broccoli 
  • 1 small zucchini chopped (or half of one large)
  • 1/4 cup each red and orange bell pepper, diced
  • 1 cup Alfredo sauce*
  • 1/4 tsp Italian seasoning
  • salt and pepper to taste
Directions:

Prepare noodles as directed on back of package.  Preheat large skillet over medium-high heat with a splash of olive oil or nonstick spray.  Cut up chicken into bite size pieces and add to skillet.  Season with salt and pepper (I personally leave the salt out), and Italian seasoning.  When the chicken is just about done, add the broccoli to the skillet.  It takes longer to cook than the other veggies so it needs a head start.  Add the remaining veggies when the broccoli is starting to turn bright green.  Continue cooking everything together, stirring occasionally, until vegetables are tender crisp or to your liking.   Add the Alfredo sauce and the noodles to the skillet, stir to completely coat everything and simmer for 3-5 minutes more.  Enjoy!

*Make sure you check the nutritional value of your Alfredo sauce and only use something works for you.  Alfredo sauces tend to be much lower in carbs than Marinara sauces, but make sure you know what you're using.  I used Classico's Roasted Garlic Alfredo which contains 3 carbs a serving, one of which is from fiber.


I made three generous portions out of this, however it can easily be 4 servings.  Pair with a side salad and also low carb garlic bread like I did here, and voila!  Instant Italian dinner in under 30 minutes.  Rachael Ray would be proud!

For the garlic bread, I use slices of Nickles 35 Multi-grain bread.  It has 8 grams of carbs per slice, and 2 of those are from fiber.  I lightly butter the bread and sprinkle with garlic and Italian seasonings, then top with a sprinkle of grated Parmesan cheese.  Lay the bread on a foil lined baking sheet and bake in a 375 degree oven for approximately 8 minutes.  Keep an eye on them just in case your oven works differently than mine!

One third of this recipe contains 184 calories, 10 grams of fat, 9 grams of carbohydrates, and 4 grams of fiber.  One fourth of the recipe contains 138 calories,  7 grams of fat, 7 grams of carbohydrates, and 3 grams of fiber.  The garlic bread and any sides you use are not included in these counts.  

Before adding the noodles and Alfredo sauce, I was looking at all the veggies and chicken in the skillet I was stirring around thinking this is quite possibly one of the best looking meals I have fixed in a long time.  The bright colors of all those veggies looked so delicious.  After adding the noodles and sauce I don't think it's quite as pretty but it's definitely oh so yummy!  I wish I had taken a picture of it in the skillet on the stove so you could see what I'm talking about!  Although you'll just have to make it and find out for yourself.  Also this recipe is great when you have a bunch of leftover veggies hanging out in the fridge.  Any kind of bell pepper, summer squash, cauliflower, green beans, or asparagus would go great in this Alfredo as well!  


Monday, May 23, 2011

Low Carb Pad Thai!

This dinner rocked!  And I received one of the greatest compliments for it as well.  Link said we should eat it every night!  When you see the calorie and carb counts in the recipe you might want to as well!  Before I got pregnant, I barely touched spicy foods.  Then for some reason while I was pregnant I got brave enough to try some new things, and then I started craving them.  Thai food became a new passion!   Obsession really.


A while back I worked on perfecting a homemade pad thai.  There is my old post explaining the recipe, however it's an incredibly unhealthy one!  Recently since we switched to a low carb diet, I haven't been able to enjoy this yummy favorite.  Rice noodles aren't exactly low carb!  Not even in the same ballpark.  I've been able to make my Thai stir fry low carb, but until I discovered shirataki noodles, I never thought I'd be able to have pad thai again!  You have no idea how happy I am that I was wrong!!

So in case you've never heard of this "miracle" noodle as some refer to it (and I believe it's even marketed under this name), here's a link to a website with some information on the noodles:  http://www.house-foods.com/Tofu/tofu_shirataki.aspx.  As the website will tell you, they are 20 calories, yes ONLY 20, a serving, 3 grams of carbs, 2 grams of fiber, gluten, dairy, and sugar-free!  And for anyone doing a low carb diet and counting *net* carbs like I am, only 1 net carb per serving!!  Frankly, it doesn't get much better than that!

Well the shirataki noodles took care of one ingredient in working towards a low carb recipe, however there were a few others I needed to "fix" as well.  The corn starch slurry that mixes in with the chicken in the original recipe was a concern.  Corn starch is 7 grams of carbs a tablespoon, and while dividing that into the number of servings in the recipe obviously lowers that number, I figured I'd just go without.  When I sliced up the chicken breast, I just poured the soy sauce over the chicken and let it sit for a few minutes before stir-frying.  No cornstarch was needed and I totally didn't miss it!  Another hurdle down.

The next consideration was the brown sugar or cane sugar that goes into the pad thai sauce.  I didn't think too long about this one.  I wanted to include a little sweetness but not too much so I used one packet of Splenda in place of the brown sugar.  Easy!  The last ingredient I had to "fix" I didn't even realize was a problem until I got to it.  Tamarind paste is another ingredient to pad Thai sauce.  It's 11 grams of carbs per tablespoon!  After seeing that, I threw it out.  This low carb thing is working so well, I'm never going to use what was left in the package.  So back to the sauce.  Thai cuisine is made up of four flavors:  sweet, spicy, salty, and sour.  In a pad Thai sauce, the brown sugar (now Splenda) is the sweet, chili sauce is the spicy, fish sauce is the salty, and tamarind paste is the sour.  I started thinking about what else I could use that's sour as a substitute and checked the fridge.  Lime juice!  I used one tablespoon.  Worked perfect!  One other note, look for a chili sauce that has no carbs.  I use Tuong Ot Toi Vietnam Chili Garlic Sauce.  There are lots of sweet chili sauces at the store, however it takes a little looking to find one that's not.  Remember that "sweet" on the label generally means there's sugar in it and more carbs!  Just make sure to check the labels!


Low Carb Pad Thai
  • 1 1/2 - 2 boneless skinless chicken breast 
  • 1 large egg
  • 1 package (8 oz) shirataki noodles, fettuccine style
  • 1 can bean sprouts
  • 1-2 tablespoons chopped green onions
  • 2 teaspoons soy sauce
  • 1 tablespoon oil
Pad Thai Sauce:
  • 1/4 cup warm water
  • 1 tablespoon lime juice
  • 1 packet Splenda
  • 2 tablespoons chili garlic sauce
  • 2 tablespoons fish sauce

Directions:  Slice up the chicken breasts into thin pieces.  Pour soy sauce over chicken and set aside for a few minutes.  Prepare sauce by combining all ingredients in a glass or bowl and mix to combine.  Set sauce aside.  Prepare shirataki noodles by draining package, and placing noodles in a microwave safe bowl.  Microwave for 1-2 minutes.  Pat dry with paper towel if necessary.  Set aside.

Heat oil in a wok or large nonstick skillet over medium-high heat. Add chicken and saute until almost done.  Move chicken to one side of the pan and add egg to the skillet.  Scramble eggs and cook until done.  Stir into chicken.  Add noodles to pan and pour sauce over them.  Stir fry for approximately 2 minutes.  Add in bean sprouts and green onion and continue stir frying until noodles and sprouts reach desired doneness, about a few minutes.

Best topped with chopped peanuts and fresh cilantro (not included in nutrition information below!)

This recipe made 3 servings.  I think I will double it next time so we have leftovers!  Here's the nutrition information based on MyFitnessPal's Recipe tracker:


Low calorie, low fat, low carb, and incredibly delicious!  This is going to be a new staple around here!  I can't wait to try some more recipes using the different kinds of shirataki noodles.  After enjoying my new pad Thai, I can truly see why they're called the "miracle" noodle!  Sorry there's no picture of the actual pad Thai here, it didn't last long enough to take one.  But really it looked, smelled, and tasted just like real restaurant take-out pad Thai, if not better because I know how much better it was for me!!

Tuesday, May 17, 2011

Flaxmeal Pancakes!

So pancakes are definitely one of my weaknesses when considering a low-carb lifestyle long term!  How can a person seriously give up pancakes?  Well I refuse to, but since I'm also so thrilled with the results I've been getting, I'm not about to set the progress back by splurging for the real thing.

I've been trying a few of the MIM recipes from the Atkins website and discussion boards.  A MIM, otherwise known as Muffin-in a-Minute, is primarily made of flaxseed meal.  The stuff is mostly fiber so when you are counting *net* carbs like on an Atkins diet, it's next to nothing!  Flaxseed absorbs water and with all that fiber keeps you filling full longer, which is a huge plus to anyone in the mindset of "dieting".  You don't have the middle of the morning or middle of the afternoon cravings when you eat something like this or even when you add it into other foods.  I mixed a little bit into some cottage cheese and didn't even notice a change in the flavor.  I've also read about people adding it into yogurt and soups (although don't add it into something hot until just before you're ready to eat).

Anyway back to the pancakes...The recipe is easy and makes only 6 small pancakes so you're not tempted by a lot of leftovers, although you should be full enough not to want seconds anyway!  I served them warm with a little pad of butter and Maple Grove Farms sugar-free syrup.  The sorbitol in the syrup is a sugar alcohol and gets subtracted from the total carbohydrates just like fiber when you are counting net carbs, so it's  a nice big 0 per serving.  Plus the serving size is 1/4 cup which is more than enough for 3 small pancakes.


Here is a link to Atkins MIM page with all the flaxseed recipes.  The pancake recipe is towards the bottom of the page and also includes a recipe for a single pancake if you only wanted to make one to go with something else for breakfast.  I won't post the exact recipe here, just in case they put out a copyright on it!  I will mention though that I left out the vanilla extract when I made mine.  I'll try to remember it next time because I will definitely be making these again, but I didn't leave it out on purpose.  I was just hungry for pancakes and got a little too eager to get these on the griddle.  I don't think they took longer than normal pancakes like the recipes says they should, but they did start to get a little dark so I may turn the griddle down lower than I typically would for pancakes next time and then let them cook a little longer that way.

I can also see these being very good with some cut up strawberries or blueberries and some homemade whipped cream (made with Splenda of course).  They aren't the light fluffy buttery pancakes you'd get at IHOP; hey are much denser and more filling!  These definitely satisfied the craving for pancakes though!  And I'm looking forward to experimenting with them again.